Gluten-Free Sourdough Starter
Learn how to make your gluten-free sourdough starter from scratch at home. All you need is some gluten-free flour, water, and some time to create delicious sourdough products.
Updated on July 12th, 2025.

Homemade Gluten-Free Sourdough Starter
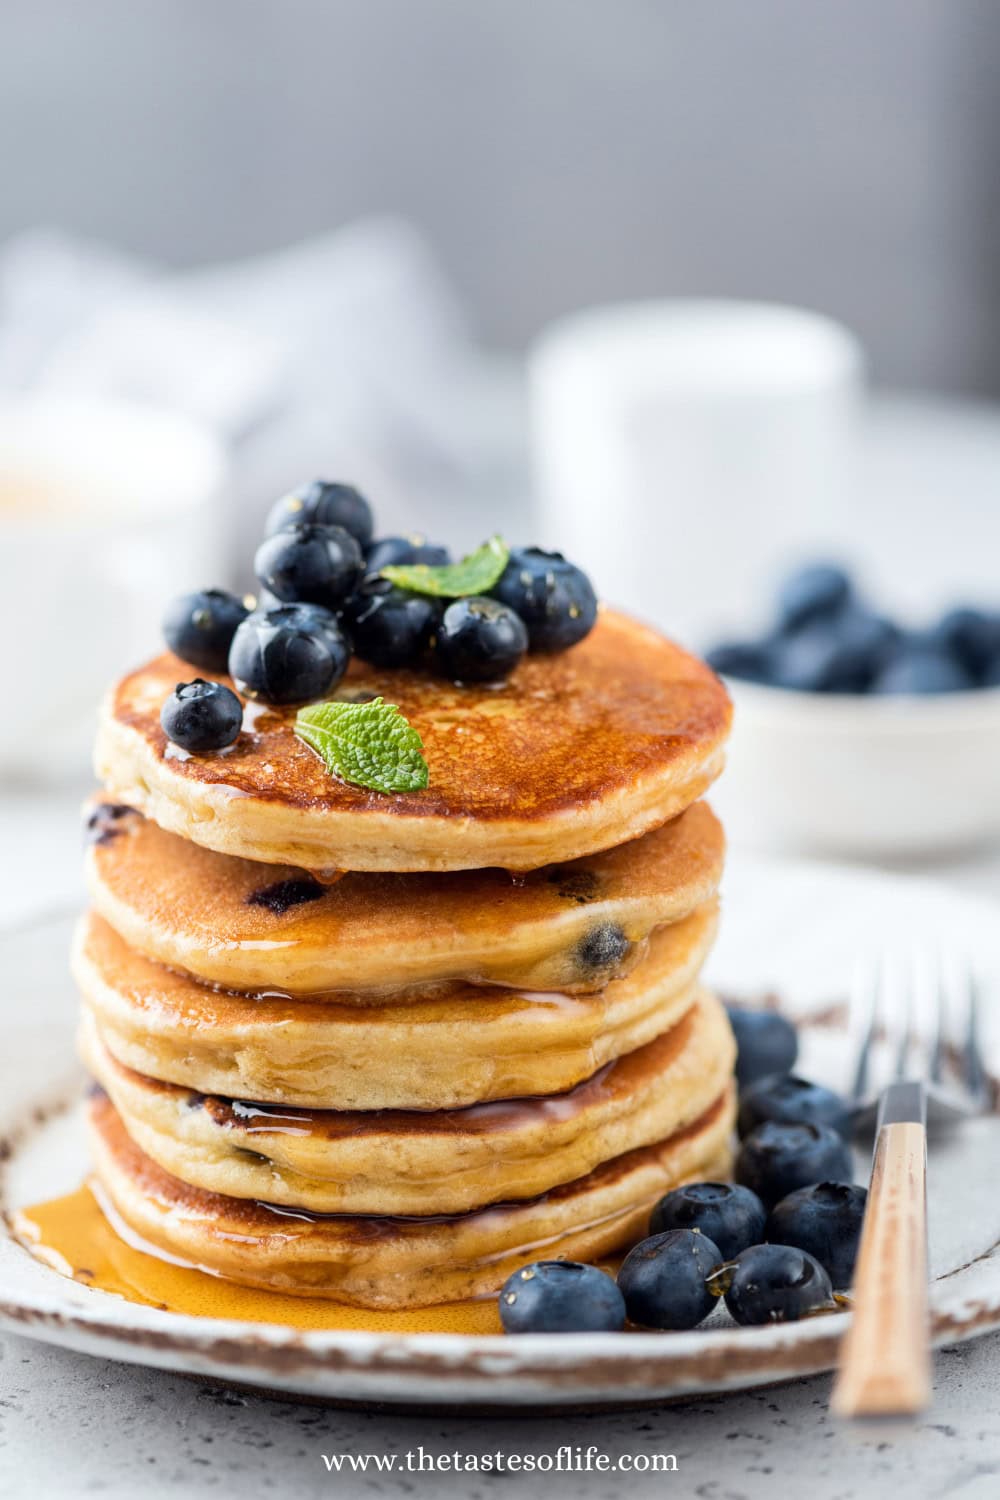
Making a gluten-free sourdough starter is a relatively easy process requiring only a handful of ingredients and a dash of time and patience. Before you know it, you’ll be whipping up homemade gluten-free sourdough creations, including bread, pizza, pancakes, and waffles!
This recipe is not only gluten-free but also suitable for vegetarians, vegans, and people with celiac disease, gluten sensitivity, and gluten intolerance.
While the process is easy now for me my journey to perfecting it involved some trial and error. Unlike its gluten-containing counterpart, I discovered that certain gluten-free flours yield more consistent and reliable results than others.
What Flour to Use for a Gluten-Free Starter
Choosing the right gluten-free flour for your sourdough starter is essential for its development and the flavor profile of your baked goods. Gluten-free flours offer a diverse range of flavors, textures, and nutritional profiles. Here are some popular gluten-free flours that you can use to create a well-balanced and flavorful gluten-free sourdough starter:
Brown Rice Flour:
- Mild in flavor and readily available, brown rice flour is a common choice for gluten-free sourdough starters. It provides a good balance of carbohydrates, proteins, and nutrients to support yeast and bacterial activity.
Sorghum Flour:
- Sorghum flour has a delicate, sweet, and nutty flavor. It contributes to a pleasant taste in the starter and the final baked goods.
Buckwheat Flour:
- Despite its name, buckwheat is naturally gluten-free and not related to wheat. Buckwheat flour gives your starter a robust, earthy flavor. It is high in protein, fiber, and essential minerals.
Teff Flour:
- Teff is an ancient grain with a slightly nutty and earthy taste. There are two kinds of teff: ivory and dark. Teff flour is high in protein, iron, and calcium.
Quinoa Flour:
- Quinoa flour is derived from a protein-rich pseudo-grain. It has a mild, slightly nutty flavor and contributes well to the structure of gluten-free baked goods. Quinoa flour is a good source of complete protein.
Amaranth Flour:
- Amaranth flour has a distinct, earthy flavor. It is high in protein, particularly lysine, an essential amino acid. Amaranth can add depth to the taste of your gluten-free sourdough.
Millet Flour:
- Millet flour has a mild, slightly sweet flavor. It’s a good source of B vitamins and can contribute to a light and airy texture in your sourdough recipes.
Cassava Flour:
- Cassava flour is made from the root of the cassava plant. It has a neutral flavor and can contribute to a light and fluffy texture in gluten-free baking. Perfect for a grain-free diet.
Oat Flour:
- Oat flour provides a pleasant flavor and contributes to the overall texture of your starter and the final baked goods.
1-to-1 flour blend
- A gluten-free 1-to-1 flour blend in your sourdough starter can be a convenient option. Gluten-free 1-to-1 flour blends are designed to mimic the properties of all-purpose wheat flour, making them a versatile choice for various recipes, including sourdough. I use this blend in one of my starters. I use King Arthur Flour and Bob’s Red Mill.
Flour Blends
- Experimenting with blends of these flours can help you achieve a well-balanced and flavorful gluten-free sourdough starter. Make your own gluten-free flour blend. Consider starting with a simple blend of brown rice flour and sorghum flour, then adjusting based on your preferences and how the starter develops. You can also use white rice flour if you like.
- You can also make your own fresh flour using a grain mill if you have one.
Remember, the key is to observe how your starter reacts to different flours and ratios, allowing you to tailor your blend to achieve the desired taste, texture, and performance in your gluten-free sourdough recipes.
How to Make a Gluten-Free Sourdough Starter
This easy recipe takes 7 days to complete, but it may take longer. You will have to check on it periodically, looking for bubbles and smell for a bit of that sour aroma you are after.
Ingredients:
- Gluten-Free Flour: Choose a gluten-free flour or a combination of flours. Popular choices include brown rice flour, sorghum flour, buckwheat flour, teff flour, or quinoa flour.
- Water: Use filtered or dechlorinated water for best results.
Day 1: Mixing the Initial Ingredients
Steps:
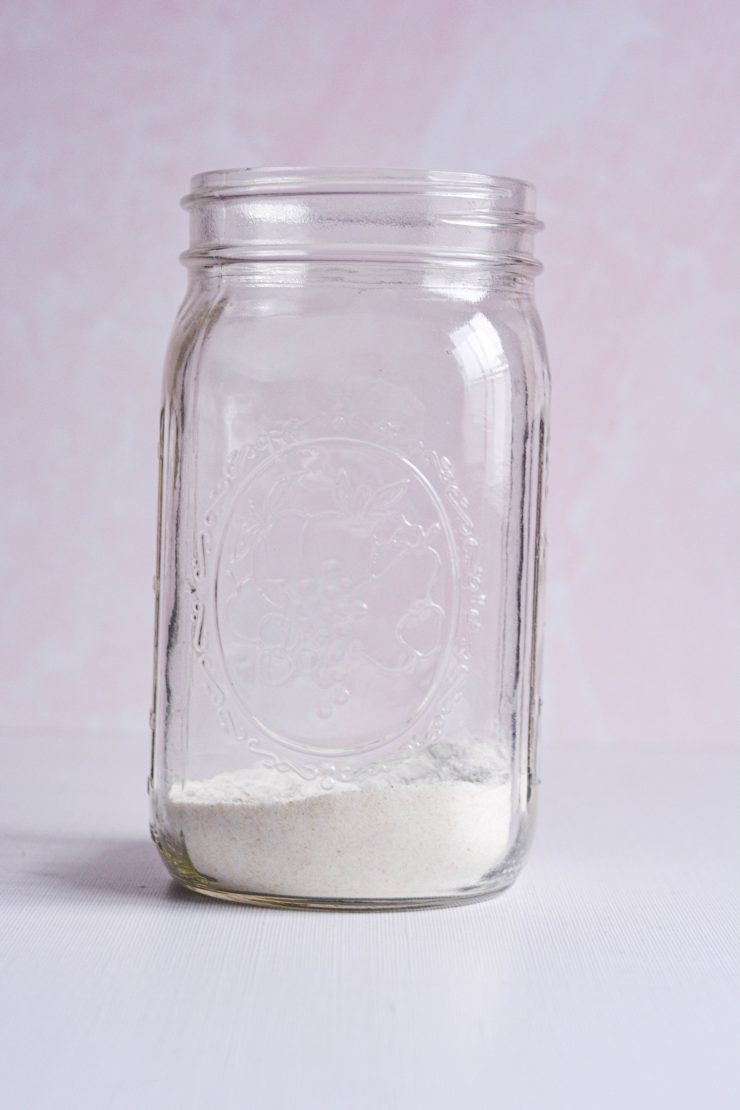
Select a Container:
- Choose a glass container with a loose-fitting lid. Avoid metal containers as they may react with the sourdough. I use a mason jar.
Mix Flour and Water:
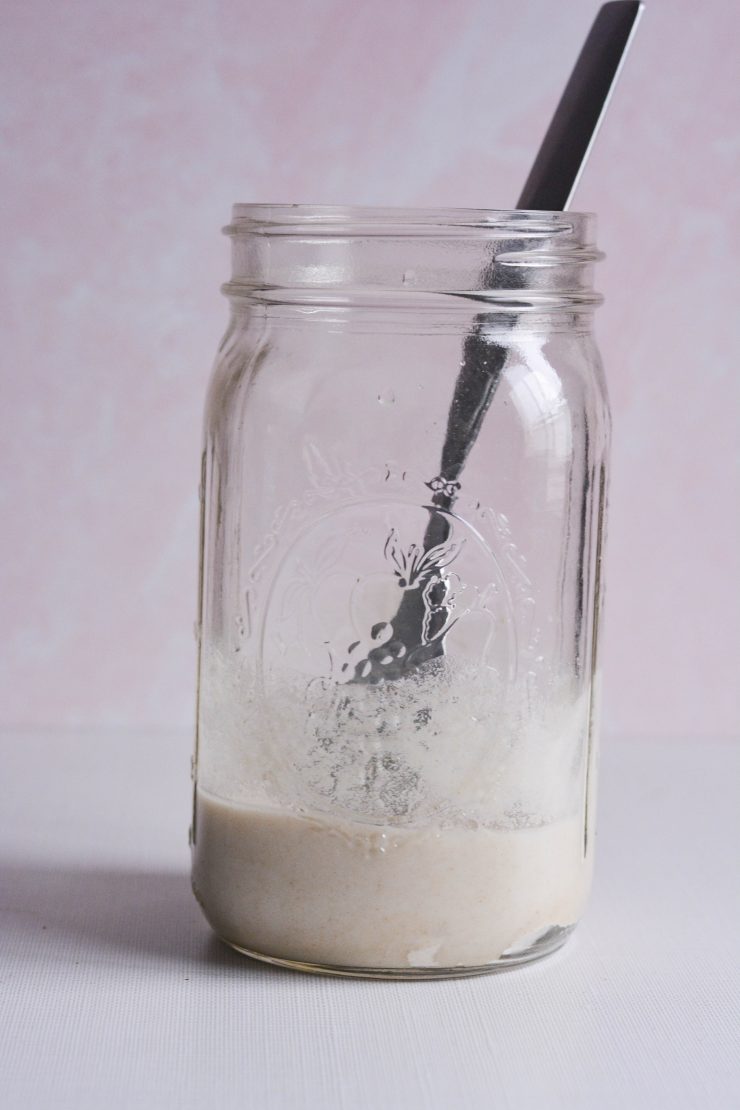
- Combine 1/2 cup of gluten-free flour in your chosen container ( I use a clean jar) with 1/2 cup of water. Do not use tap water; use filtered water. Mix well until it forms a thick, smooth batter.
- Ensure the mixture is free of lumps and has a consistency similar to pancake batter.
- Ensure you don’t make too much mess on the sides of the jar because that can contribute to mold.
Cover and Let Rest:
- Cover the container loosely with a cloth or plastic wrap, allowing air flow.
- Let the mixture rest in a warm spot at room temperature (around 70°F or 21°C) for 24 hours.
Days 2-7: Daily Feedings and Observations
Steps:
Discard and Feed the Starter:
- After 24 hours, discard half of the mixture (approximately 1/4 cup).
- Add another 1/2 cup of gluten-free flour and 1/2 cup of water.
- Mix well, cover, and let it rest for another 24 hours.
- Repeat this process daily for the next 5-6 days. The number of days it takes to complete the fermentation process to reach this point depends on the room temperature and the availability of naturally occurring yeast and bacteria. My starter takes around seven days.
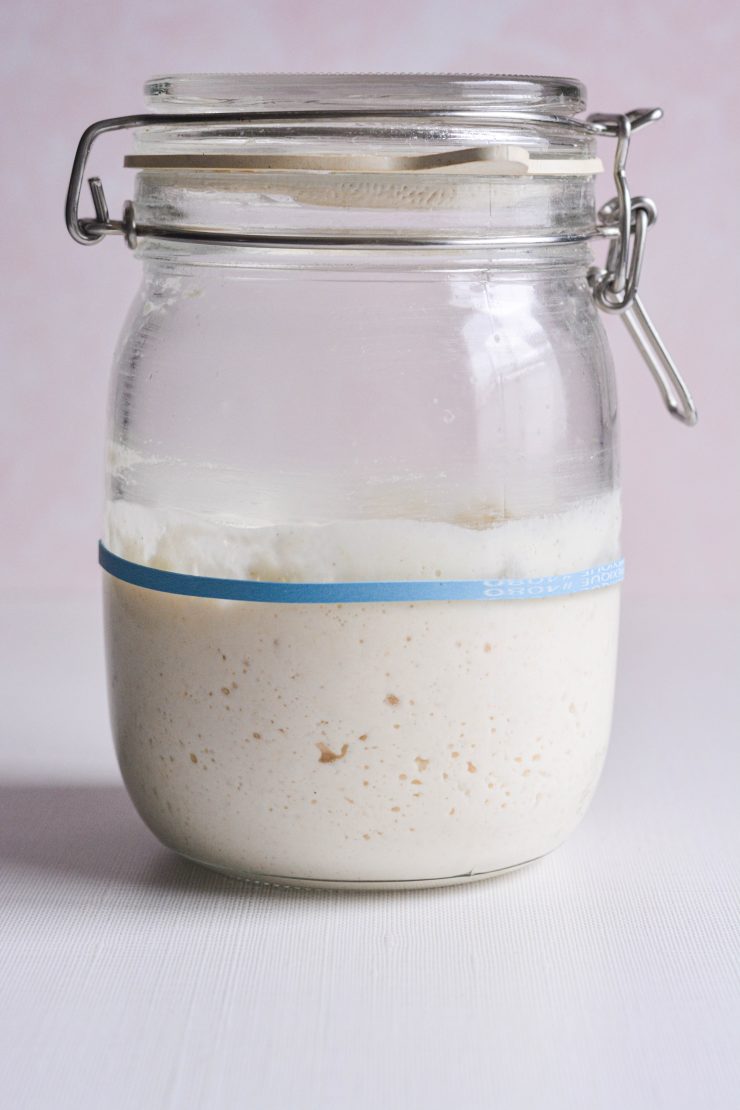
Monitor Bubbles and Aromas:
- Observe the mixture for bubbles and sweet-sour or a tangy aroma and sour taste. Bubbles indicate the presence of fermentation, and the smell should become pleasantly sour.
Troubleshooting:
- If there are no bubbles or the mixture has an unpleasant odor, adjust the feeding ratios or use a different gluten-free flour.
Transitioning to Regular Feedings
Steps:
Establish a Routine:
- Once you notice consistent bubbling and a pleasant sour smell, you can transition to regular feedings every 12 or 24 hours.
- Continue discarding and feeding as before.
Maintain Consistency:
- Maintain a consistent feeding schedule to foster the development of a robust and active sourdough starter.
Recognize Signs of Maturity:
- Your starter is mature when it consistently doubles in size within 4-6 hours of feeding, has a tangy aroma, and produces a stable structure.
- The starter is ready for baking after 3-4 weeks of consistent feeding.
Troubleshooting and Fine-Tuning
Tips:
Adjusting Hydration Levels:
- Adjust the water-to-flour ratio to achieve the desired consistency if your starter is too thick or thin.
Experimenting with Flours:
- Try different gluten-free flours or flour blends to find the best combination for your taste. Note that the buckwheat flour starter will be thicker than the others; you may need to add more water.
- Repeat day two and watch for the mixture to become puffy with a nice sweet-sour aroma, with bubbles beginning to form under the surface. The time it takes to reach this point depends on the ambient temperature and the availability of naturally occurring yeast and bacteria.
Maintaining Temperature:
- To support fermentation, keep the starter in a consistently warm environment, ideally around 70-75°F (21-24°C). When your house is colder, you can put it under a comforter (my grandmother’s old trick).
It’s ready when it’s ready.
- The initial starter must be puffy, have a sweet-sour aroma, and have bubbles under the surface to be ripe or ready.
- Last, to keep your starter healthy and robust, you must refresh it, or feed it before using it in a recipe.

Want to save this recipe?
How to Refresh a Gluten-Free Sourdough Starter
Refreshing a gluten-free starter is essential for maintaining its health and integrity. When stored in the fridge, I refresh mine once a week, but always 8-12 hours before I mix the sourdough.
Refreshing a gluten-free sourdough starter is crucial in maintaining its health and activity. The process involves discarding a portion of the starter and replenishing it with fresh flour and water. Below is a step-by-step guide on how to refresh your gluten-free sourdough starter:
Ingredients:
- Gluten-Free Sourdough Starter: The portion you want to refresh.
- Gluten-Free Flour: Use the same gluten-free flour or blend you used to create the starter.
- Water: Use filtered or dechlorinated water for optimal results.
Steps:
Assess Your Starter:
- Before refreshing, observe your gluten-free sourdough starter. It should have a pleasant aroma, show signs of activity (bubbles), and ideally be at its peak, having doubled in size since the last feeding.
Discard a Portion:
- Measure out the amount of starters you want to refresh. Discarding around half is common, but the exact amount can vary based on your needs. You can keep the discard to use in other recipes or just throw it away.
Add Fresh Flour:
- Add an equal amount of gluten-free flour to the discarded starter. For example, if you discard 1/2 cup of starter, add 1/2 cup of fresh gluten-free flour.
Add Water:
- Add water to the mixture. The water-to-flour ratio is typically 1:1, so if you add 1/2 cup of flour, add 1/2 cup of water. Adjust as needed to maintain a thick but stirrable consistency.
Mix Well:
- Stir the mixture thoroughly until the flour and water are well incorporated. Ensure there are no lumps in the mixture.
Resting Period:
- Cover the container loosely with a lid or cloth and let the refreshed starter rest at room temperature. The time it takes to peak will depend on your specific conditions but typically ranges from 4 to 12 hours.
Observation:
- During the resting period, observe the starter for signs of activity. Bubbles and a rise in volume are indications that the yeast and bacteria are actively fermenting.
Assess Maturity:
- Once the refreshed starter has doubled in size and has a tangy aroma, it is ready to use. This can take anywhere from a few hours to half a day.
- Also, You can keep the starter in a g jar with a rubber band around the starting level (after I refresh it) to track its progress as it develops.
How do I Know When My Gluten Free Starter is Ready
Knowing when your gluten-free sourdough starter is ready involves observing several key indicators demonstrating its health, activity, and readiness for baking. Here are the signs to look for:
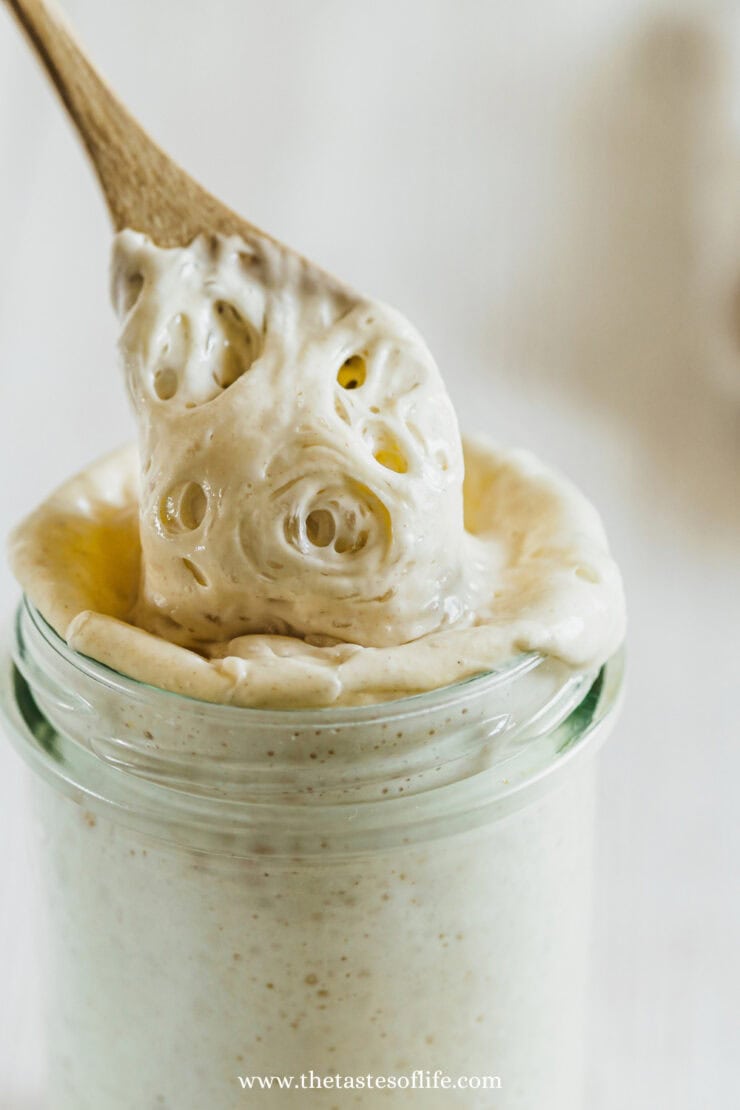
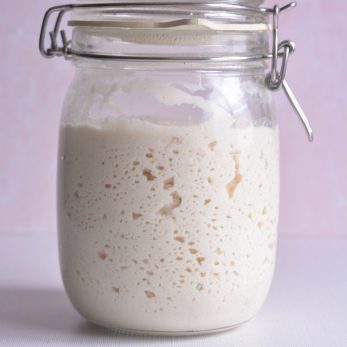
Visible Bubbles:
- Active fermentation produces carbon dioxide, creating bubbles in the starter. A well-fed and healthy gluten-free sourdough starter should exhibit a network of fine bubbles throughout the mixture. This visual cue indicates that the wild yeast and lactic acid bacteria are actively working.
Rise in Volume:
- A mature starter will consistently double or even triple in volume after each feeding. When you notice a significant rise within a reasonable time frame (usually 4-12 hours, depending on room temperature), it’s an indication that the microorganisms in the starter are thriving.
Tangy Aroma:
- As the starter ferments, it develops a distinct, slightly tangy aroma. This is a positive sign that lactic acid is being produced, contributing to the sourdough flavor. The scent should be pleasant and not overly pungent.
Consistency and Texture:
- A well-maintained gluten-free sourdough starter should have a consistent and smooth texture. It shouldn’t be too thick or too thin. When stirred, it should have a stretchy and elastic quality, indicating that it has developed a good structure.
Drooping or Collapse:
- After reaching its peak rise, a mature starter will begin to droop or collapse slightly. This is normal and indicates that the yeast has consumed most of the available food. If your starter consistently collapses within a predictable time frame after feeding, it’s a positive sign of maturity.
Time After Feeding:
- The time it takes for your gluten-free sourdough starter to reach its peak after feeding is a crucial observation. A mature starter typically achieves its maximum volume within 4 to 12 hours, depending on factors like room temperature and the specific flour used.
Float Test:
- While not strictly necessary, you can perform a float test to check the readiness of your starter. Take a teaspoon of the starter and drop it into a glass of water. If it floats, it’s a sign that the starter is sufficiently aerated and ready for baking.
- If you see your starter is struggling to double in size, you’ll need to go through a few refreshment cycles to build strength in the starter.
- You can refresh twice within 12 hours if needed. Doing this builds flavor and will help develop your gluten-free sourdough bread later. I usually do a series of refreshments after a long period in the fridge before using it in a recipe.

How To Maintain Gluten-Free Sourdough Starter?
Your sourdough starter is like a refrigerator pet that needs regular attention. The bacteria and yeast that make up the starter need to be fed (refreshed) regularly! You can keep your starter at room temperature on teh countertop in your kitchen if you’re baking daily.
If you use your starter once a week or once every other week, store your starter in the refrigerator.
What is That Layer of Liquid?
The layer of liquid on the top of your gluten-free sourdough starter is commonly referred to as “hooch.” Hooch is a natural byproduct of the fermentation process and is primarily composed of alcohol and water. Here’s what it indicates and what you can do about it:
Natural Separation:
- Hooch is a normal occurrence in sourdough starters, both with traditional and gluten-free varieties. It forms when the yeast in the starter consumes the available carbohydrates and produces alcohol and carbon dioxide as byproducts.
Sign of Maturation:
- While seeing a layer of liquid on top of your starter might be disconcerting, it’s often a sign that your gluten-free sourdough starter is hungry and needs to be fed. The formation of hooch typically occurs when the starter has consumed most of its available food.
Color and Smell:
- The color of hooch can range from clear to slightly tan or brown. If it has a strong, unpleasant smell, it might indicate that the starter has been left unfed for an extended period. A normal, slightly tangy aroma is expected.
What to Do About Hooch:
Stir it In:
- Before discarding or feeding your starter, you can simply stir the hooch back into the mixture. This redistributes the liquid, and it’s perfectly safe to incorporate back into the starter.
Assess the Feeding Schedule:
- Hooch is often a signal that your starter needs more frequent feedings. If you notice a consistent layer forming, consider adjusting your feeding schedule. More regular feedings, especially during the starter’s active phase, can help prevent the hooch from accumulating.
Adjust Hydration Levels:
- If your starter consistently develops hooch, you might consider adjusting the hydration level. This could involve using a slightly higher ratio of flour to water during feedings to create a thicker consistency in your starter.
Maintain Consistency:
- Consistency in feeding times and ratios is crucial for a healthy sourdough starter. Establishing a routine that suits your schedule and the needs of your starter will help maintain a stable and vigorous fermentation process.
Remember that hooch is a natural part of the sourdough process and doesn’t necessarily indicate a problem with your starter. It’s more of a visual cue that your starter is consuming its food, and it’s time for a refresh. Adjusting your feeding routine and ratios based on your observations will help keep your gluten-free sourdough starter active and ready for baking.

Tips
- Time will be your guide to see when the starter is ready. It’s ready when it’s ready.
- If you see any mold or a layer of orange/pinkish/white slimy color on the top, throw it out and make a new starter. You can avoid this by simply keeping your starter well-fed.
Now, after having your own beautiful starter, you are ready to make your own gluten-free sourdough bread.
Please let me know how it turned out for you! Leave a comment below and share a picture on Instagram with the hashtag #thetastesoflifeholisticblog
More Fermented Recipies
How To Make Nut and Seed Cheese
Polish Sauerkraut Salad Recipe
How To Make A Gluten-Free Sourdough Starter
Equipment
- spoon
- Rubber
- Paper towel
Ingredients
- Gluten free flour- read in teh blog
- Water
Instructions
- Day 1: Mixing the Initial IngredientsSteps:Select a Container: Mix Flour and Water:Cover and Let Rest:Choose a glass container with a loose-fitting lid. Avoid metal containers as they may react with the sourdough. I use a mason jar. Combine 1/2 cup of gluten-free flour in your chosen container with 1/2 cup of water. Mix well until it forms a thick, smooth batter. Ensure the mixture is free of lumps and the consistency is similar to pancake batter. Ensure you don't make too much mess on the sides of the jar because that can contribute to mold. Cover the container loosely with a cloth or plastic wrap, allowing air flow. Let the mixture rest at room temperature (around 70°F or 21°C) for 24 hours.
- Days 2-7: Daily Feedings and ObservationsSteps:Discard and Feed the Starter:Monitor Bubbles and Aromas:Troubleshooting:After 24 hours, discard half of the mixture (approximately 1/4 cup). Add another 1/2 cup of gluten-free flour and 1/2 cup of water. Mix well, cover, and let it rest for another 24 hours. Repeat this process daily for the next 5-6 days. How many days it takes to complete to reach this point depends on room temperature and available, naturally occurring yeast and bacteria. My starter takes around seven days. Observe the mixture for bubbles and sweet-sour or a tangy aroma. Bubbles indicate the presence of fermentation, and the smell should become pleasantly sour. If there are no bubbles or the mixture has an unpleasant odor, adjust the feeding ratios or use a different gluten-free flour.
- How to maintin the starter-read in the blog.
Love My Content? Buy Me a Coffee!
Creating these resources for you is my passion, and I love hearing how they’ve helped you on your health journey. If you appreciate my content and want to support my work, you can buy me a coffee to help fuel more tips, recipes, and inspiration. Every little bit means the world to me!