Marbled Easter Eggs Using Oil
Learn how to make Marbled Easter Eggs Using Oil. Enjoy the process of marbling the eggs with your family and have beautiful eggs for the Easter table.

Easter holds a special place in my heart, bringing back a lot of wonderful memories of my childhood in Poland. Decorating eggs is a huge tradition in Poland, and it is a cherished family tradition. We used different styles of egg painting, including one with wax. We’d gather around the table with brown eggs, vinegar, and different vegetables that we made dyes from and transformed each egg into a tiny work of art that kids loved it! The marbled effect we created using oil made them even more unique. It’s a simple yet creative way to capture the joy of the season and create lasting memories. Colored with rich dyes and given a swirling, unpredictable design, marbled eggs help elevate Easter crafts into something truly magical. Are you interested in exploring more traditions? For inspiration, read about the ancient traditions of egg painting in Poland.

Why Use Oil for Marbling?
The magic behind marbled Easter eggs lies in the use of oil. But why oil? It’s all about the way oil interacts with water-based dyes. Because oil and water don’t mix, drops of food dye in an oil mixture naturally repel patterns. When the egg is rolled through this concoction, the dye clings to some areas while leaving others untouched, creating that distinctive marbled effect.
Whether using avocado oil, olive oil, or a bit of vegetable oil, the result is stunning every time! You can also experiment with different oils and dye combinations to see which gives you the most vibrant swirls. It’s simple—just a tablespoon of olive oil added to your dye bath can work wonders.
Want to know something fascinating? This technique works beautifully with other traditional egg-dyeing methods, too. I once tried combining natural onion skins for a base color of your eggs, then added a second round of marbling. It’s an entertaining way to get creative and make each egg one-of-a-kind. If you’re interested in other traditional techniques, I recommend trying tea-dyed eggs as another fun Easter idea.

Ingredients and Tools Needed
Essential Ingredients
- Hard-boiled eggs: White or brown eggs.
- Food coloring: Choose a nontoxic one without artificial coloring. Natural food coloring made from vegetables can be found at Whole Foods or Amazon.
- White vinegar: A tablespoon of vinegar allows the dye to adhere more effectively.
- Oil: Choose from avocado, vegetable, or olive oil for the marbling effect.
- Warm water: Ensures the dyes dissolve and spread evenly in the dye bath.
If you’re looking for a recipe that incorporates versatile ingredients, check out this guide on improvising in the kitchen.
Tools You’ll Need
- Small bowls or cups: Use these to prepare the individual color dye solutions. Make sure you have enough bowls for every dye you will use; you will need one bowl for each dye.
- Paper towels: Essential for blotting excess dye and oil off the eggs.
- Wire rack or drying rack: To dry the eggs.
- Egg carton: This comes in handy for safe storage before and after dyeing.
- Rubber Gloves

Step-by-Step Instructions
- Prepare your bowls and make sure that the water is not over half an inch. Do not get the eggs fully submerged when dropped in.
- Start by adding ½ cup warm water (or boiling water) to each bowl with ½ tablespoon vinegar.
- Add 10-20 drops of food coloring dye to each bowl (one color per bowl). The darker colors don’t need as much dye, so start with 10 drops for those (red, blue, purple etc.)
- Stir the water and dye well before adding 1 tablespoon of cooking oil to each bowl. Leave just a bit of oil in a small dish to the side for later use.
- Eggs should be dry and at room temperature. Put gloves on if you want.
- Using your finger or an old small paint brush, make little streaks of oil all over the egg, but do not cover the entire egg in the oil. Random spots and streaks are what you want.
- Agitate the dye and oil mixture using a spoon or fork and immediately roll the egg in it so that the entire egg has touched the dye mixture at least once. Do this fast, immediately pull it out, and wipe dry with a paper towel.
- After wiping the egg clean, let it sit for about 5 minutes back in the egg carton, paper towel, or wire rack to dry. Make sure they’re not touching each other to prevent smearing.
- Repeat for all the eggs you would like to do.
Tips for Perfect Marbled Eggs
- Darker colors don’t need as much dye, but for lighter colors, such as green or pink, use more- 20 drops.
- Do not let the egg sit in the dye because it won’t marble. It will have only one color.
- Wiping the oil on the egg before dipping it is necessary to successfully marble the eggs.
- Make sure that your bowl is only full of enough boiling water that when an egg is set in it, the water covers about a third of it.
- You need to wipe teh dye off the egg immediately upon pulling it from the dye. This process is a quick one when it comes to the dying aspect, but it’s super fun and satisfying.
- You can use any oil you want. They all work.
- Choose white eggs for the coloring. It will work on brown eggs or farm eggs, but the colors will be a bit different, but they will still be gorgeous.
- Use natural dyes made from fruits and vegetables.
- Want those colors to pop? Opt for dark base colors.

Want detailed tips on using tea to dye eggs? Check out how to make tea-dyed eggs. It’s a fun way to transform your eggs while keeping things simple and natural!
Experimenting with Colors
Mixing shades is one of the simplest ways to add flair to your marbled Easter eggs. Try blending lighter colors, such as pastel pinks or yellows, with darker shades, such as navy or forest green.The contrast creates a stunning layered effect that highlights each swirl.
Want to save this recipe?
Here’s a tip: use separate small bowls for each dye color and start with 10-20 drops of dye to control the color intensity.
Want to keep it simple but dramatic? Stick with a single darker shade like deep red, but vary how long each egg sits in the mixture for multi-tonal details. Over time, experimenting with a spectrum of bolder so, lighter shades will help you discover your signature Easter style.

Are you curious about more traditional inspirations? Here’s a great resource on the ancient traditions of egg painting in Poland that can spark additional ideas.
Making marbled Easter eggs with oil is such a fun and meaningful tradition. It’s a unique way to add creativity and a personal touch to your Easter celebrations. With simple ingredients like hard-boiled eggs, food dye, and a tablespoon of oil, you can create stunning swirls of color that will stand out at any Easter dinner.
This activity brings families together—just like when I was growing up in Poland—making it a great way to bond with your loved ones. Be sure to let your eggs dry completely and wipe off excess oil for the perfect marbled effect. Want to learn more about the traditions behind this craft? Check out the ancient traditions of egg painting in Poland.
So, grab your supplies, gather your family, and start crafting your own marbled eggs! Have tips or a story to share? I’d love to hear your ideas in the comments below.

☕ Love My Content? Buy Me a Coffee!
Creating these resources for you is my passion, and I love hearing how they’ve helped you on your health journey. If you appreciate my content and want to support my work, you can buy me a coffee to help fuel more tips, recipes, and inspiration. Every little bit means the world to me!
More Spring Recipes
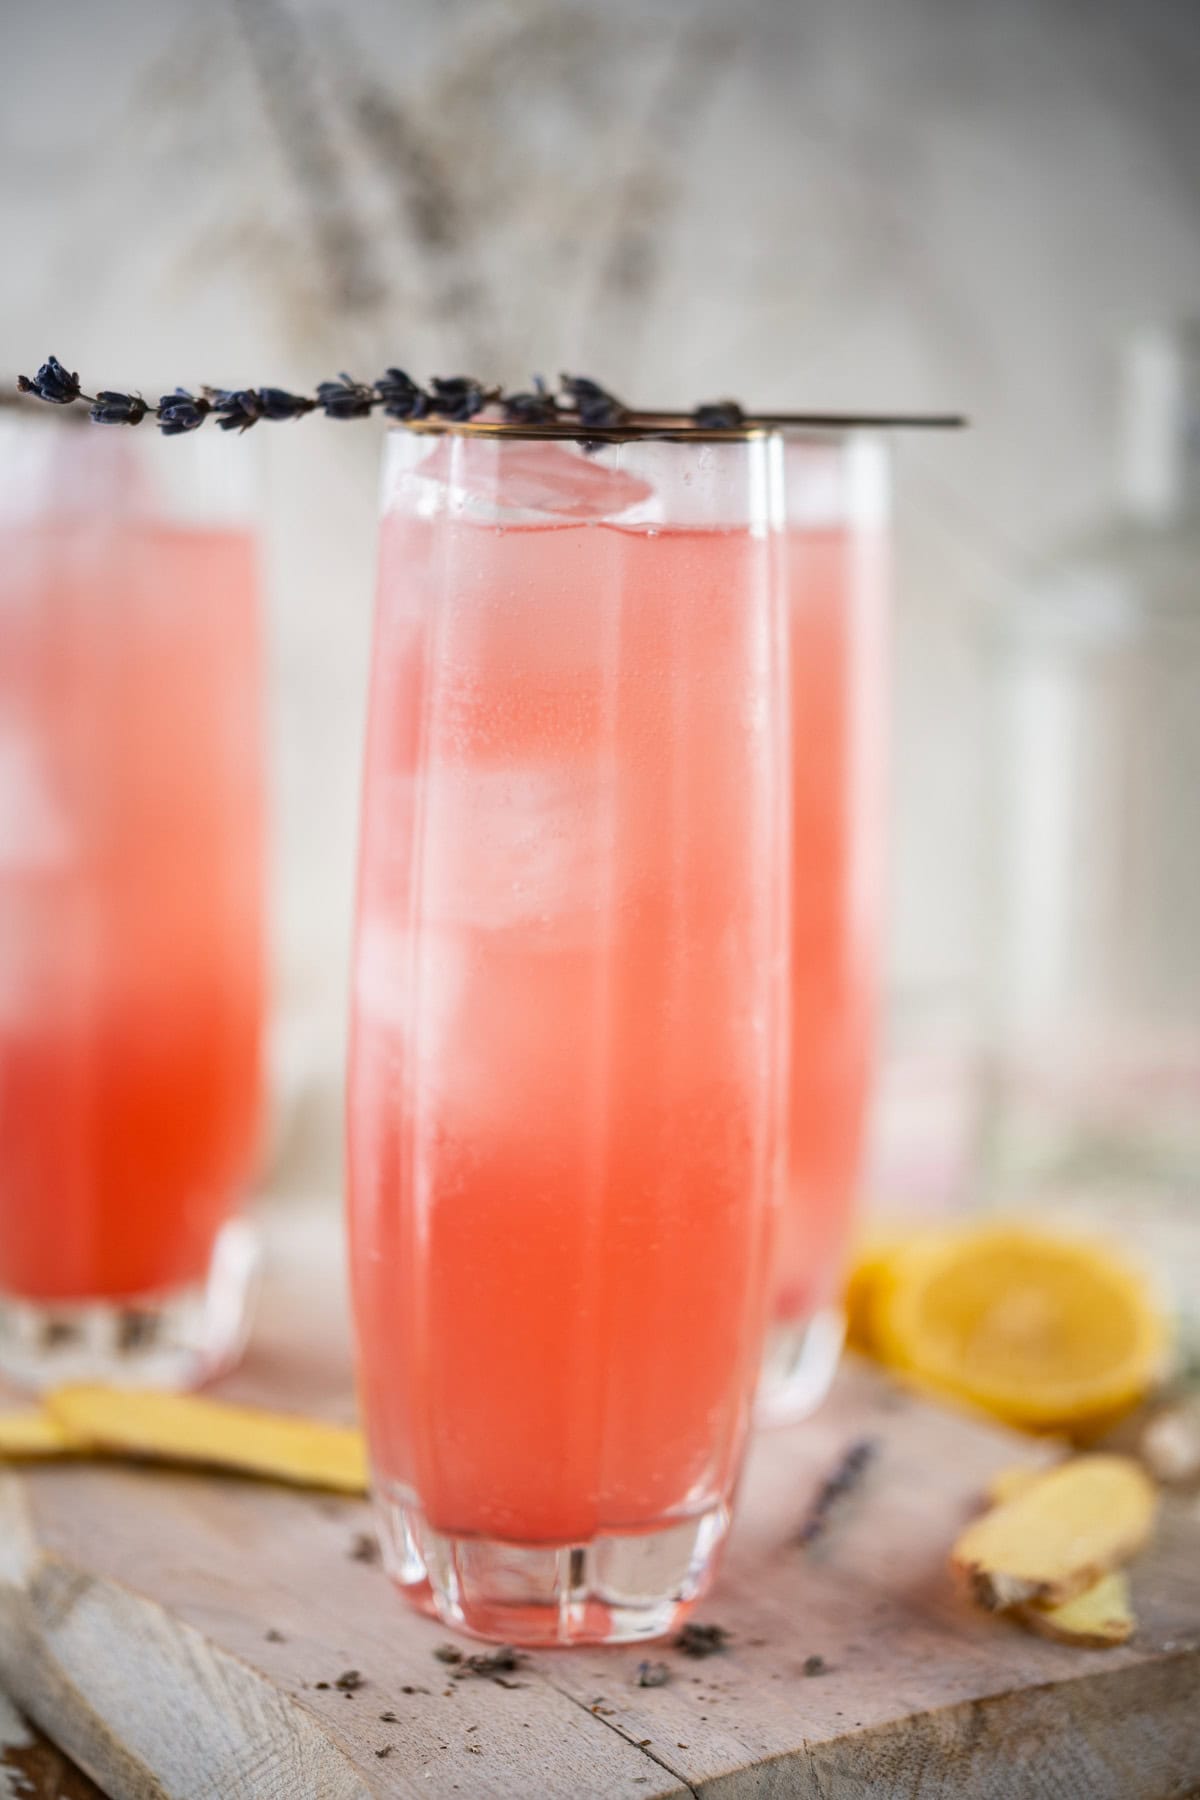
Spring Detox Smoothie Recipe With Cilantro
Creamy Spring Chicken Salad With Mayo
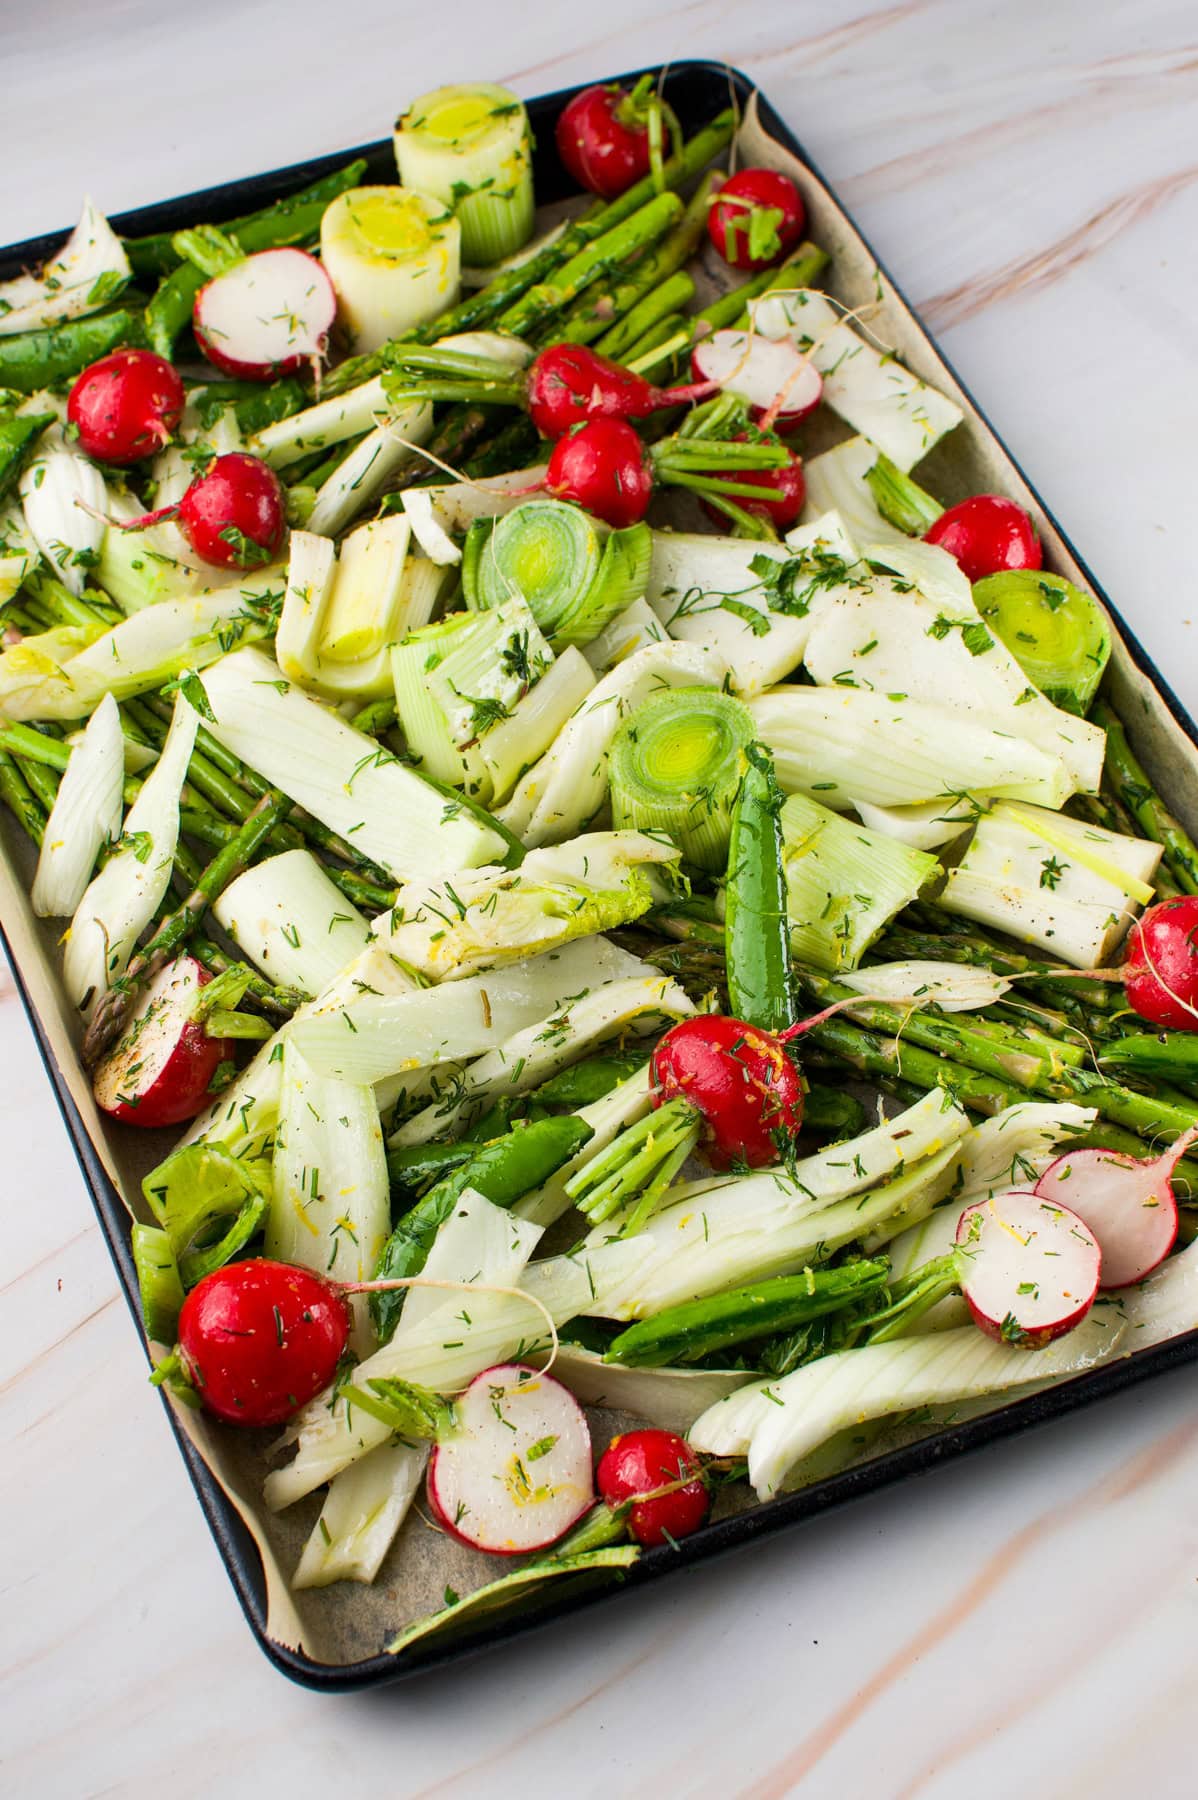
Spring Salad Recipe With Fennel
Pine Tips Balsamic Salad Dressing (From Spruce)
How To Make Chocolate-Covered Spruce Tips
How To Make Pine Tips/ Needles Infused Oil


Marbled Easter Eggs Using Oil
Equipment
- Paper towel
- Forks or spoons
Ingredients
- Boiled eggs
- 1/2 cup Boiling water
- 1 tbsp Cooking oil plus just a dab extra1/2
- 1/2 tbsp Vinegar
- 10-20 drops Food dye natural
Instructions
- You’ll need one bowl per color you would like to use. You can use cheap cereal bowls from Amazon because they’re cheap and the perfect size. You don’t want the water to be over half an inch because you don’t want the egg to get fully submerged when dropped in. Start by adding ½ cup boiling water to each bowl along with ½ tablespoon vinegar. Add 10-20 drops of dye to each bowl (one color per bowl). The darker colors don’t need as much dye, so start with 10 drops for those (purple, blue, etc.) Stir well before adding 1 tablespoon of cooking oil to each bowl. Leave just a bit of oil in a small dish to the side for later use. Make sure your eggs are at room temperature and dry. Wear gloves at this point, if desired. Using your finger or an old small paint brush, make little streaks of oil all over the egg, but do not cover the entire egg in the oil. Random spots and streaks are what you want. Agitate the dye and oil mixture using a spoon or fork and immediately roll the egg in it so that the entire egg has touched the dye mixture at least once. Do this super fast, and immediately pull it out and wipe dry with a paper towel. After wiping the egg clean, let it sit for about 5 minutes back in the egg carton to dry. Repeat for all the eggs you would like to do.
Love My Content? Buy Me a Coffee!
Creating these resources for you is my passion, and I love hearing how they’ve helped you on your health journey. If you appreciate my content and want to support my work, you can buy me a coffee to help fuel more tips, recipes, and inspiration. Every little bit means the world to me!