Homemade Eggnog (Polish Way)
This homemade eggnog (Polish way) is a creamy, luxurious drink to enjoy during the holiday season and Christmas.

Skip the store-bought cartons and additive-laden jugs this Christmas season and make your own thick, creamy, and luxurious homemade eggnog the Polish way. This easy eggnog recipe, made from scratch, is perfect for your Christmas dinner, Christmas Eve gathering, or even stirred into your morning lattes. Check Hazelnut latte, pumpkin spice latte or chcoalte pumpkin spice latter or stir it into Cinnamon dolce latte, or hot chocolate with medicinal mushrooms, or just simple hot chocolate.
Polish Eggnog Recipe
It’s that time of year again! Christmas is in the air, the stores are all playing Christmas music, and I am excited to create holiday recipes. This classic Homemade Eggnog recipe is creamy and thick with a nutmeg undertone. It will be your new favorite holiday treat!
As the holiday season approaches, a certain magic in the air calls for festive gatherings and indulgent treats. One classic beverage that has been synonymous with winter celebrations is eggnog. While store-bought versions are readily available, there’s something truly special about making your own homemade eggnog. Making eggnog takes me back to my childhood, cooking for Christmas with my family.
As a nutrition consultant and chef, I’ve always believed that the best part of the holiday season isn’t just the sparkle of lights or the scent of cinnamon, it’s the joy of bringing traditions to life in the kitchen. Growing up in Poland, my family didn’t buy store-bought eggnog; we made it from scratch. Thick, creamy, and fragrant with vanilla and nutmeg, this festive drink was as much a part of our Christmas inner as the carols and candles. My grandmother used to whisk the egg yolks by hand until they turned pale and fluffy, then fold in the milk and cream with such care that it felt like a little holiday ritual. All teh kids couldn’t wait to put their hands on it.
This website may contain affiliate links, which means I may earn a small commission at no extra cost to you if you purchase through these links. As an affiliate, I only recommend products or services I genuinely use and love. Check the affiliate disclosure here.
Why You’ll Love This Recipe
- This isn’t your average holiday eggnog.
- No store-bought, made-from-scratch version that celebrates real ingredients and balanced sweetness.
- It’s rich and velvety, yet light enough to sip without feeling overly heavy.
- You can keep it classic and non-alcoholic for family-friendly gatherings, or dress it up and serve it spiked with bourbon for a grown-up treat.
- It’s festive, nostalgic, and nourishing all at once.
Ingredients For Homemade Eggnog
- Eggs: The star of the show, eggs provide the rich, creamy texture that is characteristic of eggnog. In Poland, we often used farm-fresh eggs with rich golden yolks that gave our eggnog that signature custard-like color. The yolks add richness, body, and that naturally silky mouthfeel that no thickener can mimic.
- Dairy: Whole milk and heavy cream are essential components, offering a luxurious mouthfeel to the eggnog. Combining these dairy products creates a harmonious balance between richness and smoothness.
- Sweetener: Traditionally, white sugar is used to sweeten eggnog. However, you can experiment with alternatives like brown sugar or a combination of both to add depth and complexity to the sweetness. I like using allulose for a lower-glycemic option, but classic sugar works beautifully too. Polish-style eggnog leans lightly sweet, so you taste the cream and spice, not just sugar.
- Spices: Ground nutmeg and cinnamon are the quintessential spices that give eggnog its distinct flavor profile. Freshly grated nutmeg adds an aromatic quality, while cinnamon provides a warm, comforting undertone.
- Vanilla Extract: A touch of vanilla extract enhances the overall flavor profile of eggnog, adding a sweet and aromatic dimension that complements the spices.
- Alcohol (optional): While not a traditional ingredient, adding spirits like rum, bourbon, or brandy is a popular customization. The alcohol contributes to the flavor and acts as a preservative, allowing the eggnog to age and develop more complexity over time.
Does Homemade Eggnog Have Raw Egg?
Yes, traditional homemade eggnog recipes often include raw eggs. The eggs are typically separated, with the yolks used in the main mixture, and the whites are usually whipped separately and folded in later to create a frothy texture.
In this recipe, I heat the egg yolks to a safe temperature that also tastes slightly eggy. It is EGGnog, for goodness sake.
If you are concerned about the safety of raw eggs, use pasteurized eggs.
How to Make Homemade Eggnog
- Separate the Eggs: Separate the egg yolks from the whites. Place the yolks in a large mixing bowl and set the whites aside.
- Beat the Egg Yolks: Slowly add allulose or sugar to the egg yolks and beat them until the mixture becomes pale and slightly thickened. This step ensures a smooth and creamy eggnog. If you are using dark sugar, the mixture will not be pale.
- Combine Milk and Cream: In a separate saucepan, combine the whole milk and heavy cream. Heat the mixture over medium heat until it reaches a scalding temperature (just before boiling). Stir occasionally to prevent scorching.
- Temper the Eggs: Gradually pour the hot milk and cream mixture into the egg yolks, whisking constantly. This process, known as tempering, prevents the eggs from scrambling. Continue whisking until the ingredients are well combined.
- Return to Heat: Pour the egg and milk mixture back into the saucepan and return it to the stove over medium heat. Stir continuously until the mixture thickens slightly, coating the back of a spoon. Be cautious not to let it boil.
- Add Spices and Vanilla: Remove the mixture from the heat. Once the mixture has thickened, add the ground nutmeg, cinnamon, and vanilla extract. Stir well to distribute the spices evenly.
- Cool the Mixture: Allow the eggnog base to cool to room temperature. Once cooled, cover the bowl and refrigerate for at least two hours or overnight to allow the flavors to meld and intensify.
- Whip the Egg Whites: Whip the egg whites in a clean, dry bowl until stiff peaks form. Gently fold the whipped egg whites into the chilled eggnog mixture, creating a light and frothy texture. Serve immediately. ( You can totally skip this process if you want. This way your eggnog can stay refrigerated, and you can drink it later).
- Add Alcohol (Optional): If you choose to include alcohol, stir in your preferred spirit at this stage. The alcohol enhances the flavor and acts as a preservative, allowing you to store the eggnog for an extended time.
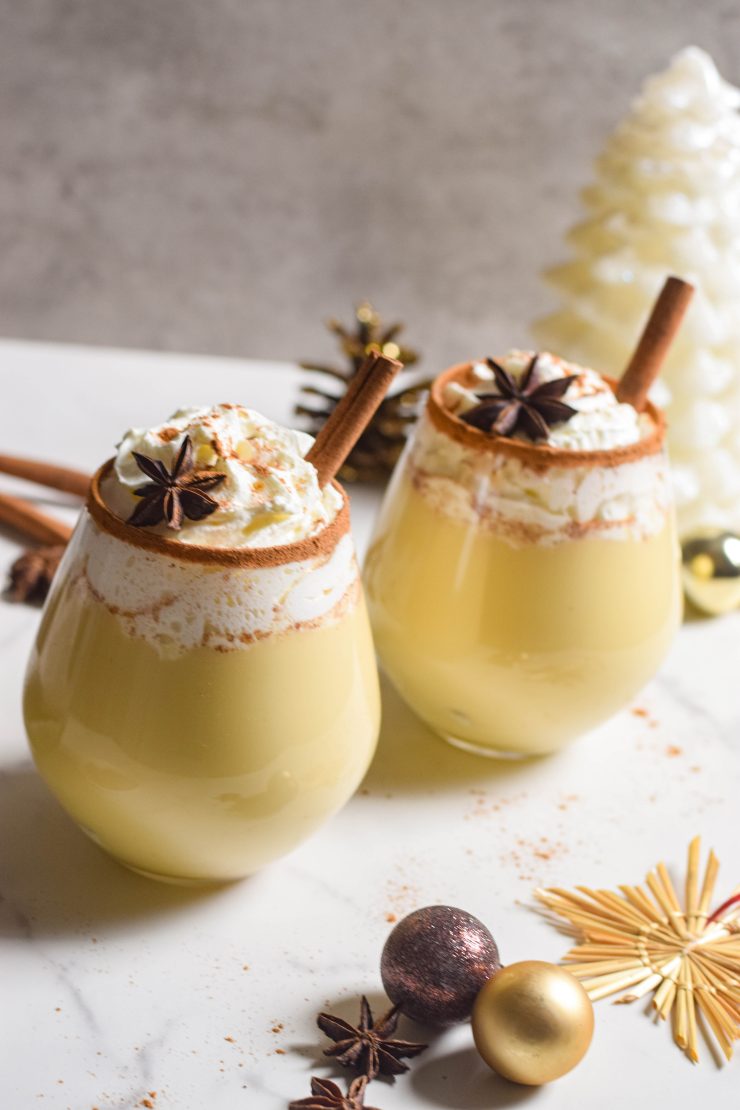
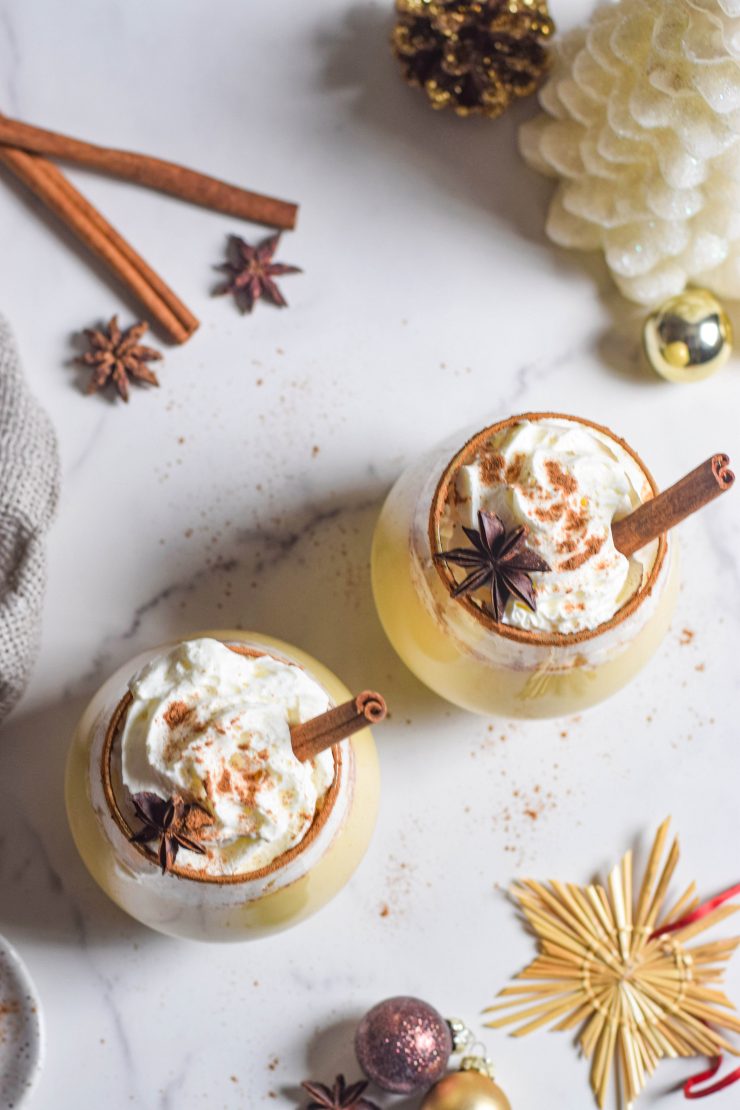
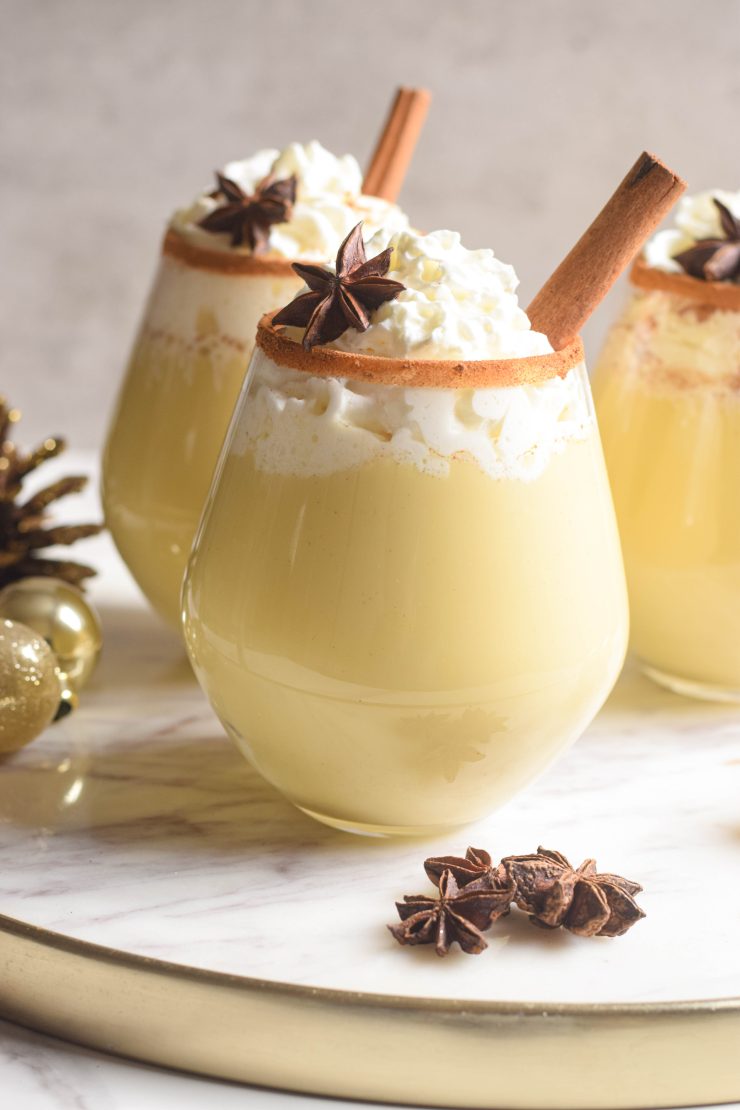
- Serve and Enjoy: Ladle the homemade eggnog into cups or mugs, garnishing each serving with whipped cream and a sprinkle of ground nutmeg. Optionally, add a cinnamon stick for a festive touch. Serve chilled and savor the rich, creamy goodness of your homemade creation.
Spiked Eggnog Recipe
Eggnog is good, but spiked eggnog is even more festive. It is excellent, especially for cold winter evenings. It warms your belly and body!
Just make sure to go easy on it, because it can be very deceiving! Eggnog is one of those drinks that goes down smoothly, and you don’t feel the alcohol.
Always add alcohol after chilling for maximum impact.
Best Alcohol for Homemade Eggnog
Most people go for darker and amber-colored liquor but don’t limit yourself. In my country, vodka is and was the way to go. Plenty of creamy and clear alcohols will complement this holiday cocktail just as much. The amount of alcohol used is based on your preference.
These are our favorites:
Want to save this recipe?
- Vodka
- Bourbon
- Aged rum or dark rum
- Brandy
- Irish whiskey
- Scotch whisky
- Brandy

Ways to Serve
- Classic Christmas inner: Serve chilled in small glasses with a sprinkle of cinnamon.
- Christmas Eve dinner: Offer it as a dessert drink or with cookies.
- Morning lattes: Add a splash to your coffee or espresso for an instant holiday latte.
- Festive cocktail: Spike with bourbon, rum, or brandy for a cozy evening sip.
- Dessert base: Pour over bread pudding or use in French toast batter for a decadent brunch.
Storage
Store in an airtight glass jar or bottle in the fridge for up to 3 days. Shake before serving, as natural separation may occur. For longer storage, keep the base without alcohol and add spirits only before serving.
Tips for Serving:
- Garnish Fresh: Add any final garnishes, such as a sprinkle of nutmeg or a cinnamon stick, just before serving.
- Stir Before Serving: If the eggnog has been sitting in the refrigerator for an extended period, give it a gentle stir before serving to ensure that any settled ingredients are well mixed.
Equipment
- Medium saucepan
- Whisk
- Spatula
- Fine-mesh strainer
- Glass bottle or jar for storage
FAQ
Can I make this ahead of time?
Yes! In fact, the flavor improves overnight. Chill and serve the next day for best results.
Is it safe to drink with raw eggs?
In this recipe, the yolks are gently cooked with warm milk, making it safe and creamy.
How can I make it extra thick?
Cook a few extra minutes over low heat, stirring constantly, or add a splash more cream.
Now it’s your turn to bring a bit of old-world Polish magic to your holiday season. Make this homemade eggnog, pour it into your favorite mug, and toast to cozy traditions and nourishing indulgence. Share this recipe with a friend, pin it to your holiday board, and tag me when you make it, I’d love to see your festive creations!
Did you make this recipe?
Please let me know how it turned out for you! Leave a comment below.

Homemade Eggnog (Polish Way)
Instructions
- Separate the Eggs: Separate the egg yolks from the whites. Place the yolks in a large mixing bowl and set the whites aside. 2. Beat the Egg Yolks: Slowly add allulose or sugar to the egg yolks and beat them until the mixture becomes pale and slightly thickened. This step ensures a smooth and creamy eggnog. If you are using dark sugar, the mixture will not be pale.3. Combine Milk and Cream: In a separate saucepan, combine the whole milk and heavy cream. Heat the mixture over medium heat until it reaches a scalding temperature (just before boiling). Stir occasionally to prevent scorching.4. Temper the Eggs: Gradually pour the hot milk and cream mixture into the egg yolks, whisking constantly. This process, known as tempering, prevents the eggs from scrambling. Continue whisking until the ingredients are well combined.5. Return to Heat: Pour the egg and milk mixture back into the saucepan and return it to the stove over medium heat. Stir continuously until the mixture thickens slightly, coating the back of a spoon. Be cautious not to let it boil.6. Add Spices and Vanilla: Remove the mixture from the heat. Once the mixture has thickened, add the ground nutmeg, cinnamon, and vanilla extract. Stir well to distribute the spices evenly.7. Cool the Mixture: Allow the eggnog base to cool to room temperature. Once cooled, cover the bowl and refrigerate for at least two hours or overnight to allow the flavors to meld and intensify.8. Whip the Egg Whites: Whip the egg whites in a clean, dry bowl until stiff peaks form. Gently fold the whipped egg whites into the chilled eggnog mixture, creating a light and frothy texture. Serve immediately. ( You can totally skip this process if you want. This way your eggnog can stay refrigerated, and you can drink it later).9. Add Alcohol (Optional): If you choose to include alcohol, stir in your preferred spirit at this stage. The alcohol enhances the flavor and acts as a preservative, allowing you to store the eggnog for an extended time. 10. Serve and Enjoy: Ladle the homemade eggnog into cups or mugs, garnishing each serving with whipped cream and a sprinkle of ground nutmeg. Optionally, add a cinnamon stick for a festive touch. Serve chilled and savor the rich, creamy goodness of your homemade creation.
Nutrition
MORE HOLIDAY RECIPES:
Love My Content? Buy Me a Coffee!
Creating these resources for you is my passion, and I love hearing how they’ve helped you on your health journey. If you appreciate my content and want to support my work, you can buy me a coffee to help fuel more tips, recipes, and inspiration. Every little bit means the world to me!