Gluten-Free Dairy-Free Coconut Cake
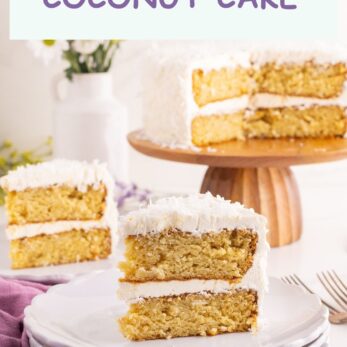
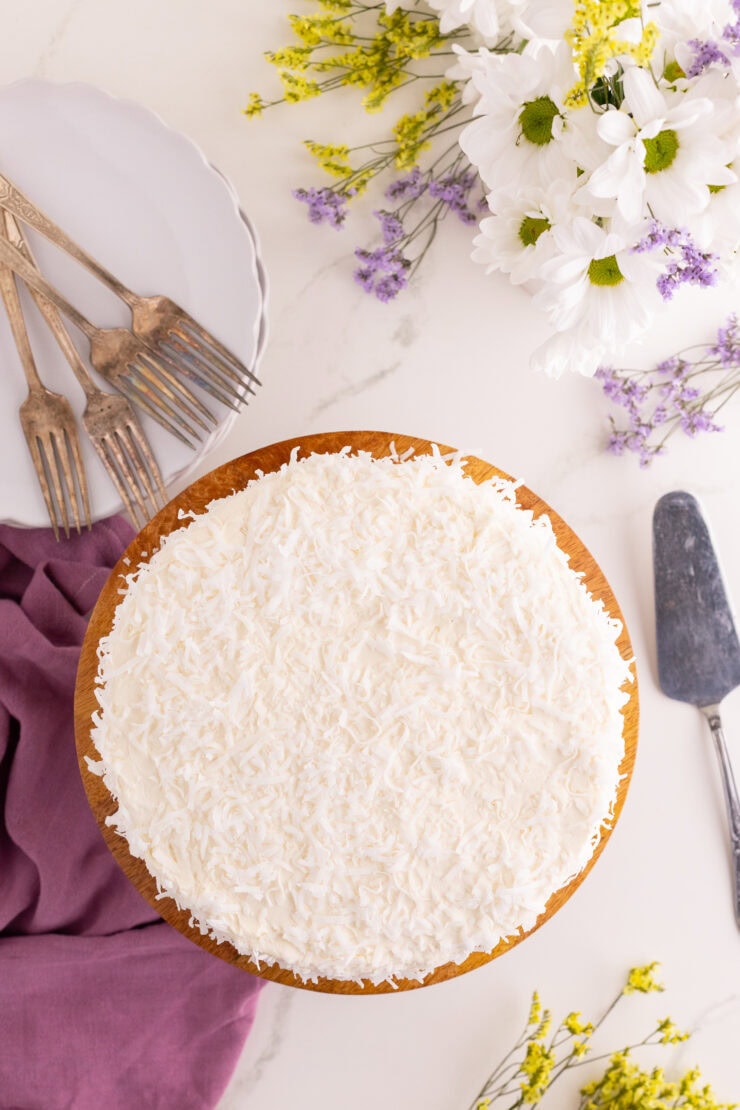
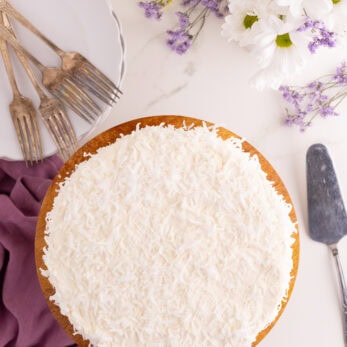
This moist gluten-free dairy-free coconut cake is fluffy, tender, and full of fresh coconut and vanilla flavor. A stunning spring dessert perfect for Easter, Mother’s Day, or anytime coconut cravings hit.

Gluten-Free Dairy-Free Coconut Cake
As a nutrition consultant and chef, I’m always looking for ways to make classic desserts work for more people without turning them into sad “diet” versions. Cake should still feel like cake. Soft, fluffy, moist, and a little celebratory.
And let me be honest for a second, coconut flavor is my love. I will eat coconut in all forms. Fresh coconut and vanilla, coconut milk and shredded coconut, toasted coconut flakes… anything coconut will go for me. I do not remember where this love of coconut came from because in my house, we did not use much of it. I created this dairy-free coconut layer cake for my birthday party not that long ago, and it was a big hit.
This cake is something I’d make for spring gatherings, Easter, or Mother’s Day. It’s oven-baked, golden-brown, and tender, with that classic layer cake feel, but it just happens to be a gluten-free dessert and a dairy-free dessert. I’ve served this to people who swear they can “always tell” when something is gluten-free, and every single time the reaction is the same: surprise. No one will ever guess it’s gluten-free. It’s rich but feels light without being dry, and full of fresh coconut and vanilla flavor. Honestly? It’s the ultimate cake for coconut fans.
Why You’ll Love This Recipe
- Moist, fluffy, and tender with a soft crumb
- A true layer cake that feels festive and special
- Naturally dairy-free and completely gluten-free
- Perfect for spring celebrations like Easter and Mother’s Day
- Made with simple, reliable ingredients that work every time
- No one will ever guess it’s gluten-free

Ingredients for Gluten-Free Dairy-Free Coconut Cake
This website may contain affiliate links, which means I may earn a small commission at no extra cost to you if you purchase through these links. As an affiliate, I only recommend products or services I genuinely use and love. Check the affiliate disclosure here.
Did you know?
People like coconut flavor because it’s naturally rich and slightly sweet, and it gives desserts a familiar, comforting taste. Coconut works well with many other flavors, especially vanilla and citrus, which makes it easy to enjoy in cakes and pastries.
How to Make Gluten-Free Dairy-Free Coconut Cake
- Preheat oven to 350 degrees. Spray 2 8-inch round cake pans with cooking spray, line with parchment paper.
- In a large bowl, sift together the flour, baking powder, xanthan gum, baking soda, and salt. Add the shredded coconut and sugar, stir to combine. Add the coconut milk, oil, eggs, and vanilla, stir until thoroughly combined.
- Divide the batter evenly between the two prepared pans, spread into an even layer. Bake cake until a deep golden brown, and a toothpick inserted in the center comes out clean, 30-35 minutes.
- Remove the baked cakes from the oven, place on wire rack to cool for 10-15 minutes. Run a knife along the outer edge of the pan to loosen the cakes. Invert cakes onto wire racks, continue to cool at room temperature until completely cool, about an hour.
- In the bowl of a stand mixer fitted with the whisk attachment, beat the butter until smooth and creamy, 2-3 minutes, scraping down the bowl and whisk once during mixing. Add the powdered sugar, mix on low until the mixture begins to come together, increasing the speed to medium high until well combined, frosting will be thick. Add 1-2 tablespoons of coconut milk and the vanilla extract, mix on medium until thoroughly incorporated. Add 1-2 tablespoons of coconut milk if needed for desired consistency. Cover until ready to use.
- To assemble cake, place one cake round on a cake stand or plate. Top with ¾- 1 cup of frosting, spreading into an even layer. Place second cake, ensuring cake is centered and straight. Top the top and sides of the cake with the remaining buttercream. Top with the sweetened flaked coconut, press gently to help adhere. Cover and store it in the refrigerator, allow cake to set at room temperature for 30 minutes before serving.

Ingredient Substitutions
- Gluten-free flour: Use King Arthur Measure for Measure Flour works too, or Red Mills gluten-free flour for a similar result
- Coconut milk: Full-fat canned coconut milk works best, but boxed coconut milk can be used in a pinch
- Avocado oil: Swap with melted coconut oil if needed
- Vegan butter: Any high-quality dairy-free butter alternative works well
Want to save this recipe?
Chef Angie’s Tips
- Make sure eggs are at room temperature for the best texture.
- I realized the shredded coconut was doing what coconuts do best: soaking things up. It was absorbing some of the cake’s moisture, which made the crumb a little tighter than I wanted.
- The first, and most important, step to getting a truly moist gluten-free coconut cake is soaking the shredded coconut. Don’t skip this. Open a can of full-fat coconut milk, pour it over the shredded coconut in a bowl, and let it soak for about an hour. This gives the coconut time to soften and fully absorb the coconut milk, adding moisture and boosting the coconut flavor in the cake layers.
- If you’re making this cake gluten-free, take a quick look at your flour blend. It needs to contain xanthan gum. If it doesn’t, add one teaspoon to your dry ingredients. Xanthan gum acts like a binder in gluten-free baking; it’s basically the glue that holds everything together. Without it, you’ll end up with crumbly cake layers instead of clean, beautiful slices.
- Cream cheese frosting, especially dairy-free cream cheese frosting, has a mind of its own. It’s soft, it warms up fast, and it absolutely does not like being rushed. The refrigerator will be your best friend as you fill and stack it.
- Most cakes I frost with room-temperature buttercream, but for this one, I actually prefer the frosting slightly chilled. Not rock hard, just cool enough to hold its shape and give you some control.
- The secret to working with soft frostings and fillings is temperature. Keep everything cold. Chill the cake often. Let the frosting firm up before moving on.
Ways To Serve
- As a classic layer cake for Easter brunch
- With mocktails: Very Berry Mocktail, Pineapple Ginger Ale Mocktail, Juniper and Cranberry Mocktail.
- With cocktails: Pomegranate Blackberry Cocktail, Dragon Fruit Lavender Gin Cocktail, Pink Gin Cocktail, Hazelnut Espresso Martini.
- With fresh berries for a light spring dessert
- Finished with toasted coconut flakes for extra texture
- As a centerpiece cake for Mother’s Day celebrations

Storage
Store covered at room temperature for one day. Refrigerate for longer storage and bring to room temperature before serving. Freeze unfrosted cake layers for easy future assembly.
FAQ
Is this cake really moist without dairy?
Yes. Coconut milk and avocado oil create a moist, tender crumb without any dairy.
Can I make this cake ahead of time?
Absolutely. Bake the layers in advance and frost the day you plan to serve.
What makes this cake fluffy and not dense?
Room temperature eggs, proper mixing, and the right gluten-free flour blend make all the difference.

If you make this dairy-free coconut layer cake, I’d love for you to share it. Pin this recipe for later, send it to a fellow coconut lover, or share the blog so more people can enjoy this moist gluten-free coconut cake. And if you’re anything like me and love coconut as much as I do, this one deserves a permanent spot in your dessert rotation.
Gluten-Free Dairy-Free Coconut Cake
Equipment
- Cake stand
- 2 8-inch round cake pans
Ingredients
- 2 cups 1:1 gluten-free flour
- 1 tbsp Baking powder
- 1 tsp Baking soda
- 1 tbsp Xantham gum
- 1/2 tsp Salt
- 1 1/2 cup Allulosse or powdered sugar
- 1 cup sweetened shredded coconut, plus 2-3 cups for garnish
- 1 cup Coconut milk full fat
- 3/4 cup Avocado oil
- 4 Eggs
- 2 tsp Vanilla extract
Dairy-Free Buttercream
- 16 tbsp Vegan butter softened
- 4 cups Allulosse or 5 cups powdered sugar
- 4 tbsp Full-fat coconut milk
- 2 tsp Vanilla extract
Instructions
- Step 1. Preheat oven to 350 degrees. Spray 2 8-inch round cake pans with cooking spray, line with parchment paper.2. Step 2. In a large bowl, sift together the flour, baking powder, xanthan gum, baking soda, and salt. Add the shredded coconut and sugar, stir to combine. Add the coconut milk, oil, eggs, and vanilla, stir until thoroughly combined.3. Step 3. Divide the batter evenly between the two prepared pans, spread into an even layer. Bake cake until a deep golden brown, and a toothpick inserted in the center comes out clean, 30-35 minutes.4. Step 4. Remove the baked cakes from the oven, place on wire rack to cool for 10-15 minutes. Run a knife along the outer edge of the pan to loosen the cakes. Invert cakes onto wire racks, continue to cool at room temperature until completely cool, about an hour.5. Step 5. In the bowl of a stand mixer fitted with the whisk attachment, beat the butter until smooth and creamy, 2-3 minutes, scraping down the bowl and whisk once during mixing. Add the powdered sugar, mix on low until the mixture begins to come together, increasing the speed to medium high until well combined, frosting will be thick. Add 1-2 tablespoons of coconut milk and the vanilla extract, mix on medium until thoroughly incorporated. Add 1-2 tablespoons of coconut milk if needed for desired consistency. Cover until ready to use.6. Step 6. To assemble cake, place one cake round on a cake stand or plate. Top with ¾- 1 cup of frosting, spreading into an even layer. Place second cake, ensuring cake is centered and straight. Top the top and sides of the cake with the remaining buttercream. Top with the sweetened flaked coconut, press gently to help adhere. Cover and store it in the refrigerator, allow cake to set at room temperature for 30 minutes before serving.
Nutrition
Love My Content? Buy Me a Coffee!
Creating these resources for you is my passion, and I love hearing how they’ve helped you on your health journey. If you appreciate my content and want to support my work, you can buy me a coffee to help fuel more tips, recipes, and inspiration. Every little bit means the world to me!