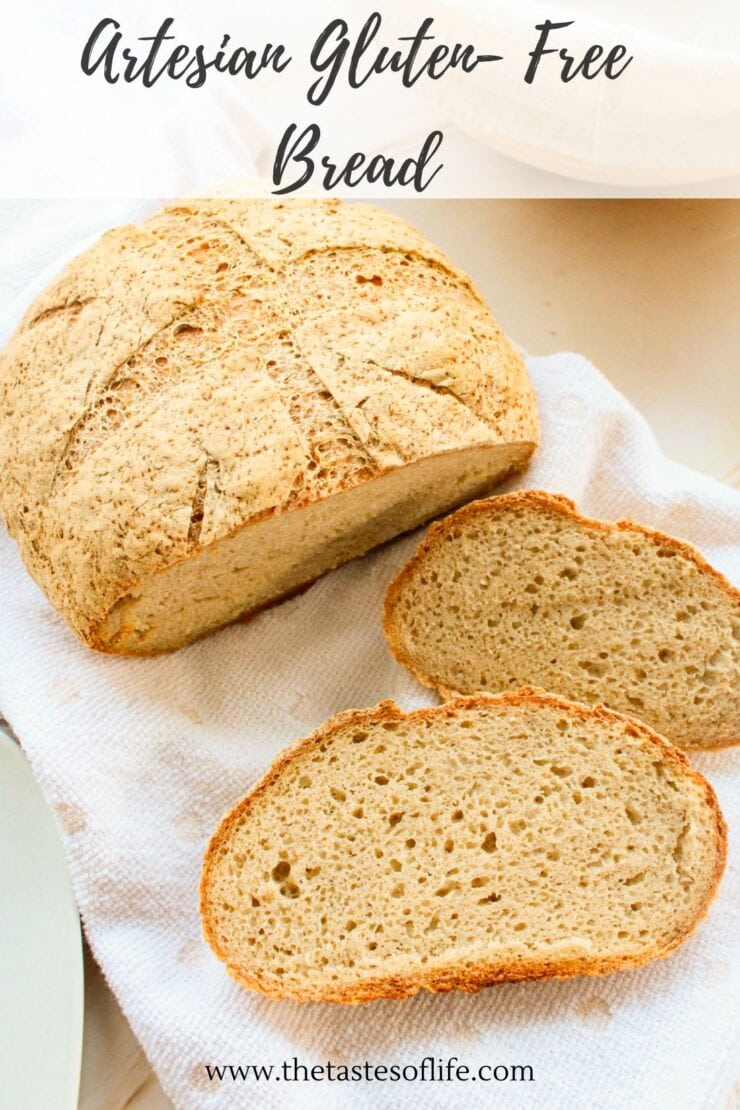
Artesian Gluten- Free Bread

Looking for a bakery-style artisan gluten-free bread that is crusty on the outside and soft and chewy inside? This Artesian Gluten- Free Bread recipe is easy to prepare, made with simple whole-food ingredients, and tastes delicious like wheat bread. I am sharing my go-to loaf that never disappoints.
Artesian Gluten- Free Bread
There is something deeply satisfying about pulling a beautiful loaf of bread out of the oven. That crackling crust. That soft, chewy open crumb. That smell fills every corner of your kitchen. When I was a child, baking bread was a ritual. There was nothing better than a crunchy bread straight from teh stove with butter on it. For years, I thought that experience was reserved for people who eat wheat. I was wrong.
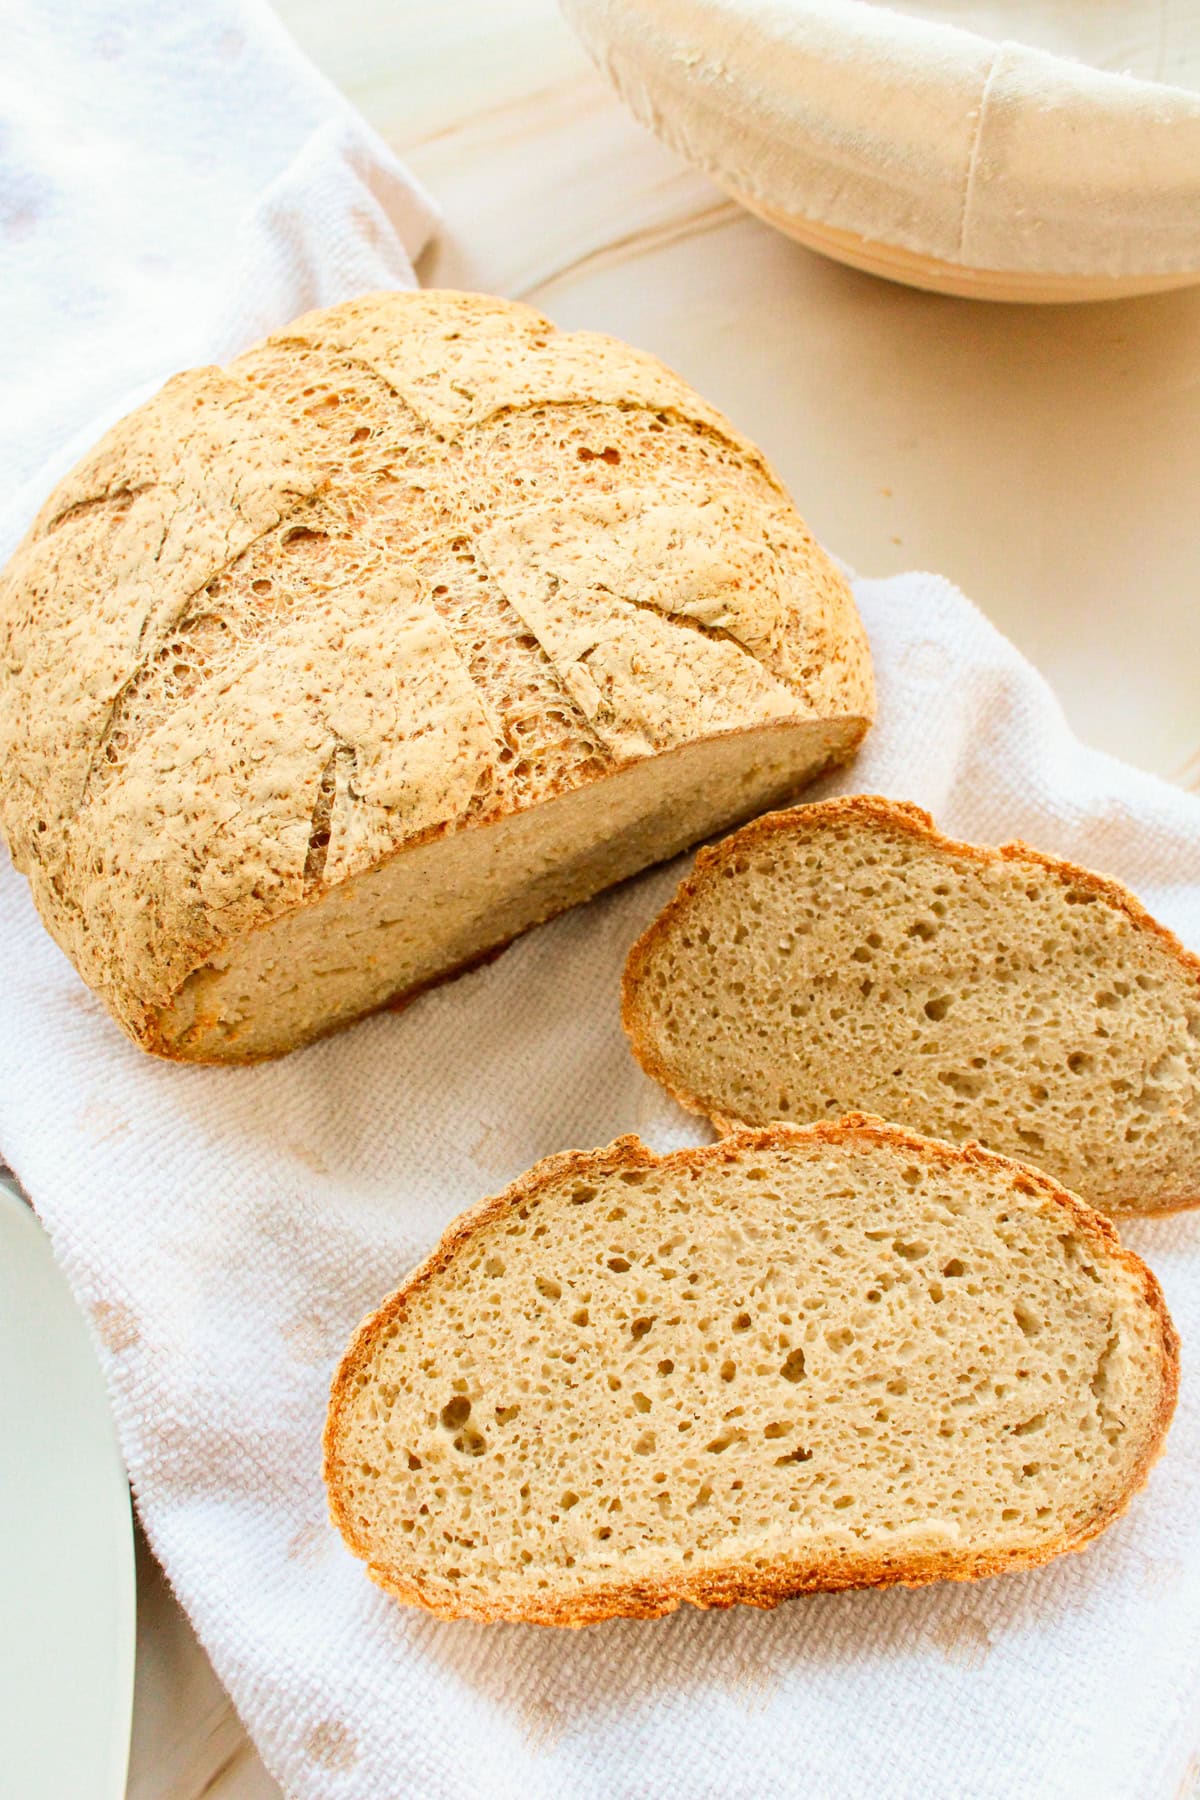
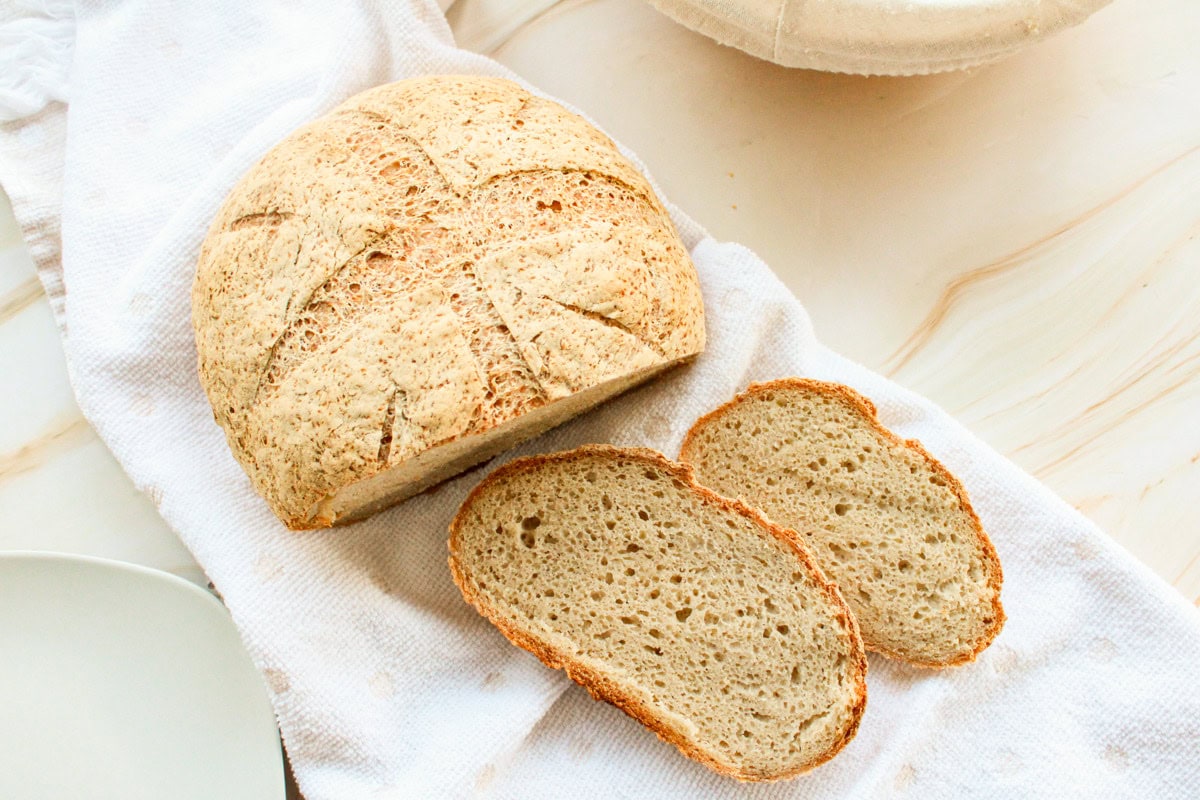
This Artesian Gluten Free Bread is here to change everything you think you know about gluten-free baking. It has a soft, chewy open crumb and a deliciously crisp caramelised crust that rivals anything you would find at a bakery. It is easy to prepare, requires no fancy equipment, and tastes so delicious like wheat bread that even gluten-eaters at my table ask for seconds.
As a nutrition consultant and chef, I have spent years working with clients who come to me frustrated. They have been told to cut gluten for health reasons, and they miss bread. Not just any bread. Real bread. The kind with a crust that shatters when you slice it and an inside that pulls apart in soft, pillowy layers.
I spent a long time in my kitchen experimenting, failing, and starting over. Gluten-free bread has a reputation for being dense, gummy, or cardboard-like, and for good reason. Most recipes try to simply swap wheat flour for a single alternative without understanding the structural role gluten actually plays. Once I understood that, everything changed.
I began approaching gluten-free bread the way I approach all cooking: from a functional, ingredient-first perspective. Every element on my list earned its place not because the bag said gluten-free, but because it served a specific purpose. The result is this loaf. It has become a staple in my home and one of my clients’ most requested recipes. I hope it becomes a staple in yours, too.
Check out my other gluten-free bread recipes: gluten-free sandwich bread, high-protein seed bread, gluten-free sourdough bread, plantain bread, nut and seed bread.
Ingredients for Artesian Gluten-Free Bread
This website may contain affiliate links, which means I may earn a small commission at no extra cost to you if you purchase through these links. As an affiliate, I only recommend products or services I genuinely use and love. Check the affiliate disclosure here.
Did you know?
Gluten- free dough typically contains much more water than wheat dough. At first glance it often looks more like a thick batter than traditional dough. This higher hydration is necessary because gluten free flours absorb liquid differently and need extra moisture to develop a soft crumb.
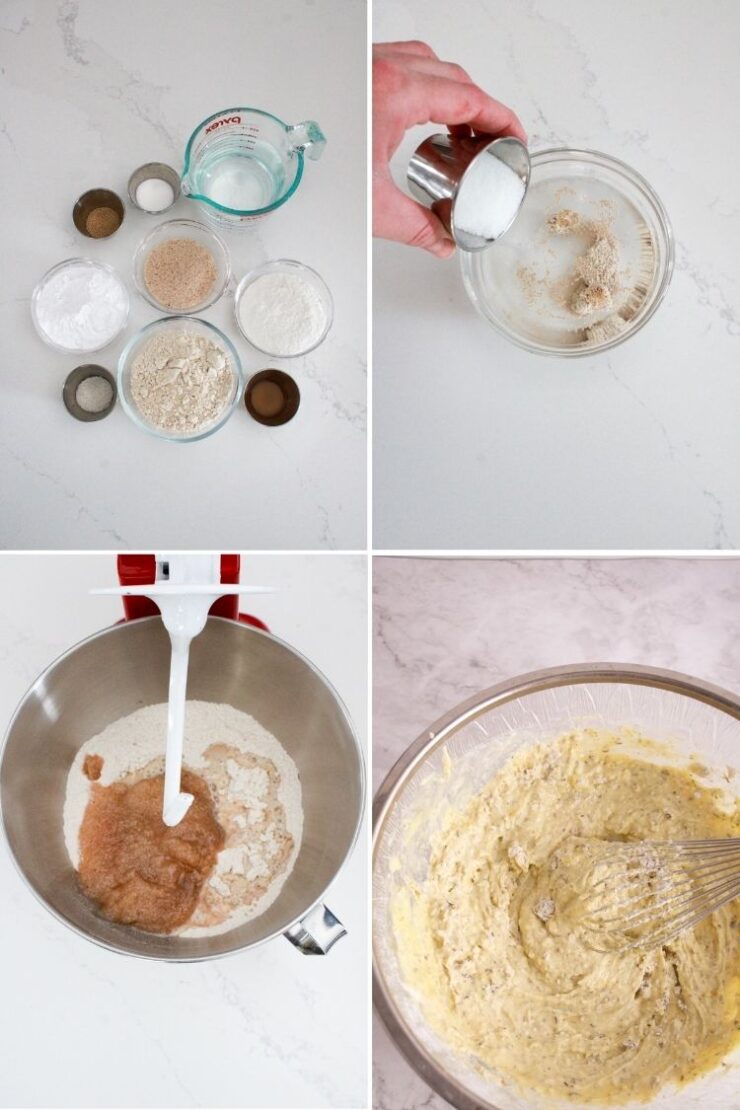
How to Make Artesian Gluten-Free Bread
- In a medium bowl, measure 150g of warm water, then add the active dry yeast and granulated sugar. Mix, then set aside.
- In a separate small bowl, add 240g warm water and psyllium husk, mix and set aside to form a gel.
- In a large mixing bowl add sorghum flour, potato starch, white rice flour, sea salt and whisk to combine.
- By now the yeast mixture should be frothy, add it into the dry ingredients as well as the psyllium gel and apple cider vinegar. Using the hook attachment of a stand mixer mix until the dough comes together pulling away from the sides of the bowl. This could take 5-10 minutes. Or you can need the dough by hand.
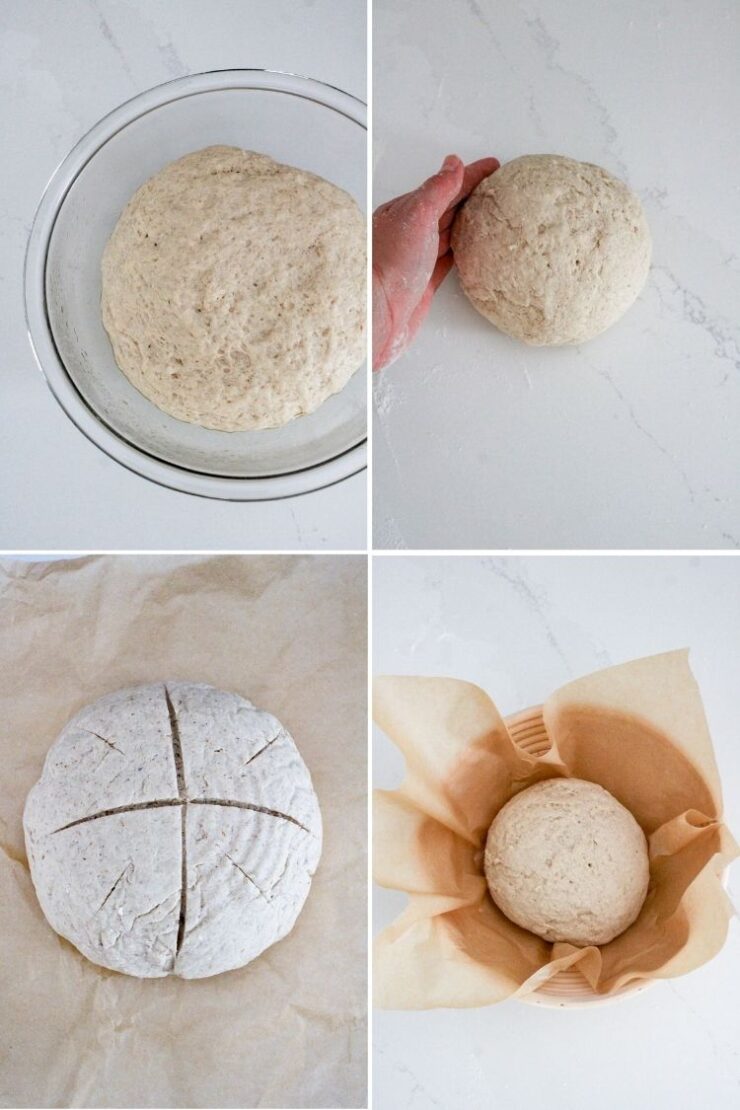
- Lightly oil your work surface as well as hands with olive oil or other neutral tasting oil and place your dough onto the oiled area and knead the dough a couple of times until smooth and shape into a ball. Place the dough ball into a large lightly oiled bowl, cover with a damp towel and set aside to rise for 1 hour until doubled in size.
- Once the dough is doubled in size lightly flour work surface with rice flour and place the dough onto the floured area. Knead the dough a couple more times shaping it into a tight ball and place seam side up into a proofing basket or bowl lined with parchment paper for a second rise. Set aside for 1 hour covered with a damp towel.
- Preheat oven to 480°F and place a cast iron skillet on middle rack as well as a small baking pan on lower rack to preheat as well.
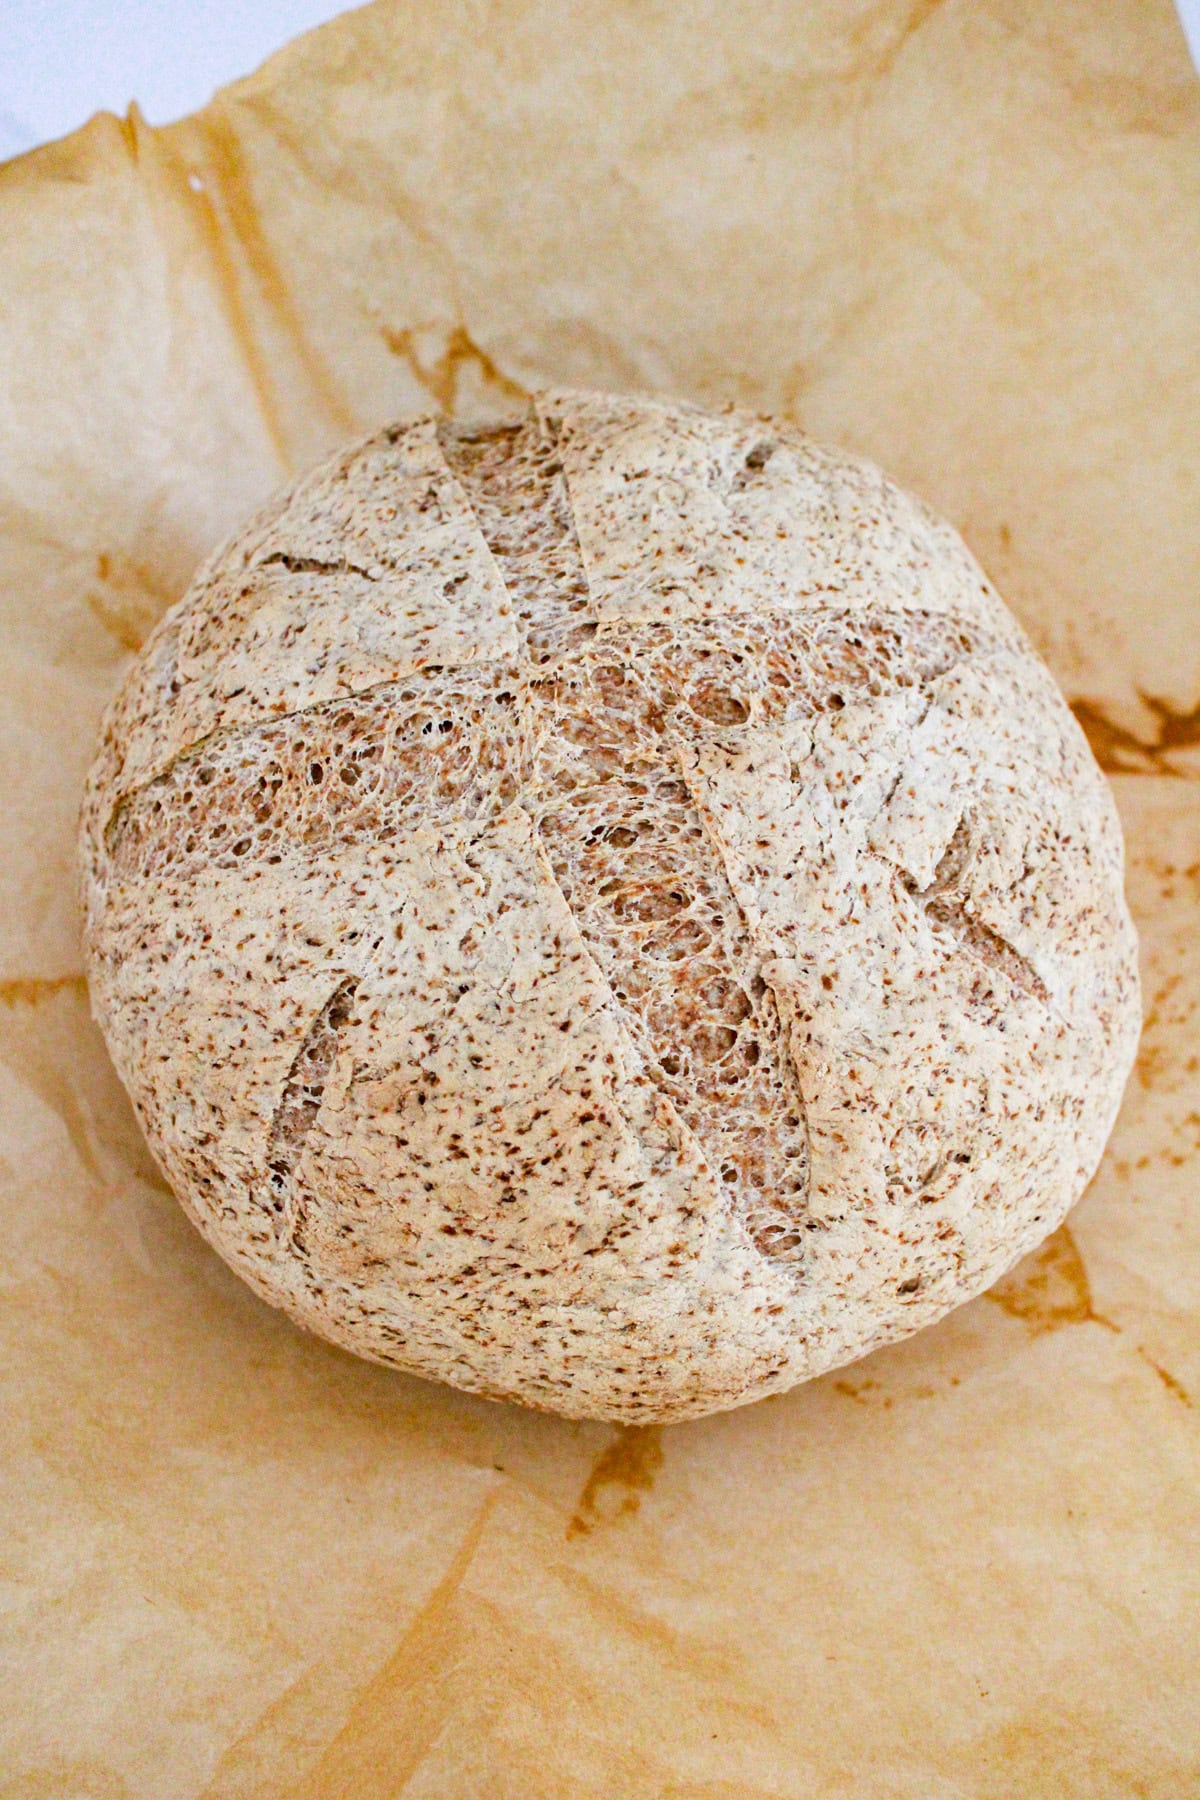
- Once the dough has doubled in size, remove from proofing basket or bowl and place it onto a sheet of parchment paper. Score the dough with a bread lame or sharp knife. Add 5 ice cubes to the baking tray on the bottom rack and place the dough into the cast iron skillet. Bake for 20 minutes with steam. Do not open the oven door during this time.
- Remove the baking tray with water from the bottom rack after 20 minutes and close the door, reduce the oven temperature to 450°F and continue baking for 40-50 minutes until golden brown.
- Lift the bread out by holding the sides of the parchment paper and allow the bread to come to room temperature before cutting into it.
Ingredient Substitutions
Just to let you know, if you replace any of those ingredients, the bread will be diffrent and might not have the same results. I suggest experimenting with. Gluten-free baking is a lot of experimentation!
- Sorghum flour – can be replaced with buckwheat flour or oat flour for a slightly different flavor profile while still maintaining a hearty structure.
- White rice flour – can be swapped with brown rice flour for a deeper flavor and slightly more rustic crumb.
- Potato starch – can be replaced with tapioca starch or arrowroot starch if you prefer a slightly chewier interior texture.
- Cane sugar – can be substituted with coconut sugar to activate the yeast.
- Apple cider vinegar – can be replaced with lemon juice if you want a similar acidic boost for the dough.
Want to save this recipe?
Chef Angie’s Tips
- Do not skip the Dutch oven. The steam trapped during the first part of baking creates that deliciously crisp caramelised crust. It is the secret to making bakery-style crusty bread at home.
- Score the dough confidently and deeply. A shallow score will not open properly, and you will lose that beautiful ear on top of the loaf.
- Let the bread cool for at least one hour before slicing. The interior continues to set as it cools. Cutting too early results in a gummy crumb, even if the outside looks done.
- Weigh your ingredients. Volume measurements for gluten-free flours vary significantly depending on how packed the flour is. A kitchen scale takes the guesswork out entirely.
- If your dough feels too wet after mixing, resist the urge to add more flour. The psyllium husk needs time to absorb the liquid. Give it five minutes before adjusting.
Ways To Serve
- Slice and toast with lemon herb-infused compound butter
- With soups and stews
- With Mediterranean spring herb whipped feta dip or lavender lemon infused cream cheese dip
- With Polish baked chicken pate
- With balsamic vinaigrette, romesco, or nut cheese
- Turn leftovers into gluten-free croutons for salads.
Storage
Store the bread at room temperature in a paper bag or bread box to maintain its crusty exterior. For longer storage, wrap slices and freeze them. Toast frozen slices directly from the freezer for a quick breakfast.
Avoid refrigerating the bread as it can dry out the crumb.
FAQ
Why is psyllium husk important in gluten-free bread?
Psyllium creates the elasticity that gluten normally provides. It helps the dough hold together and develop a chewy texture.
Why does gluten-free dough look softer than wheat dough?
Gluten-free dough typically has a higher hydration level. This allows the ingredients to hydrate properly and helps create a soft crumb.
Why did my bread turn out dense?
This usually comes down to the yeast not being properly activated, too much flour being added, or the dough not having enough time to proof. Make sure your water is warm but not hot, around 100 to 110 degrees Fahrenheit, and that you give the dough enough time to rise before baking.
How do I get a crusty exterior?
Baking the loaf in a hot Dutch oven creates steam that helps develop a crusty, bakery-style exterior.
Why should I wait before slicing the bread?
Allowing the loaf to cool lets the crumb finish setting, so the slices hold their shape and maintain the soft interior.
If you love discovering nourishing recipes that bring comfort and flavor to your kitchen, this artisan gluten-free bread is a wonderful place to start. Try baking it this week and experience how simple it can be to create a loaf that is crusty on the outside with a soft, chewy, open crumb.
If you enjoyed this recipe, share it with a friend who loves baking, save it for later, and pin it to your favorite breadboard on Pinterest so you can easily come back to it whenever you want to make fresh homemade bread again.
Artesian Gluten- Free Bread
Ingredients
- 8 g Active dry yeast
- 25 g Sugar
- 390 g Warm water (this will be divided into 2 parts)
- 20 g Psyllium husk
- 130 g Sorghum flour
- 100 g Potato starch
- 90 g White rice flour
- 11 g Salt
- 12 g Apple cider vinegar
Instructions
- In a small bowl measure 150g warm water and add in active dry yeast and granulated sugar, mix and set aside.2. In a separate small bowl, add 240g warm water and psyllium husk, mix and set aside to form a gel.3. In a large mixing bowl add sorghum flour, potato starch, white rice flour, sea salt and whisk to combine.4. By now the yeast mixture should be frothy, add it into the dry ingredients as well as the psyllium gel and apple cider vinegar. Using the hook attachment of a stand mixer mix until the dough comes together pulling away from the sides of the bowl. This could take 5-10 minutes. Or you can need the dough by hand.5. Lightly oil your work surface as well as hands with olive oil or other neutral tasting oil and place your dough onto the oiled area and knead the dough a couple of times until smooth and shape into a ball. Place the dough ball into a large lightly oiled bowl, cover with a damp towel and set aside to rise for 1 hour until doubled in size.6. Once the dough is doubled in size lightly flour work surface with rice flour and place the dough onto the floured area. Knead the dough a couple more times shaping it into a tight ball and place seam side up into a proofing basket or bowl lined with parchment paper for a second rise. Set aside for 1 hour covered with a damp towel.7. Preheat oven to 480°F and place a cast iron skillet on middle rack as well as a small baking pan on lower rack to preheat as well.8. Once the dough has doubled in size, remove from proofing basket or bowl and place it onto a sheet of parchment paper. Score the dough with a bread lame or sharp knife. Add 5 ice cubes to the baking tray on the bottom rack and place the dough into the cast iron skillet. Bake for 20 minutes with steam. Do not open the oven door during this time. 9. Remove the baking tray with water from the bottom rack after 20 minutes and close the door, reduce the oven temperature to 450°F and continue baking for 40-50 minutes until golden brown. 10. Lift the bread out by holding the sides of the parchment paper and allow the bread to come to room temperature before cutting into it.
Nutrition
Love My Content? Buy Me a Coffee!
Creating these resources for you is my passion, and I love hearing how they’ve helped you on your health journey. If you appreciate my content and want to support my work, you can buy me a coffee to help fuel more tips, recipes, and inspiration. Every little bit means the world to me!